Congratulations on your new laptop! Please follow the appropriate steps depending on the operating system of your device (Windows or macOS).
PC Laptop (Autopilot Enrolled)
Please follow the steps below before you start to use device. Plug-in the charger and power on your Windows laptop.
- Region: United States
- Keyboard Layout: US
- The next screen will ask you to add a second keyboard layout. If you don't want this, click on Skip.
- Let's connect you to a network: Connect to your network.
- Welcome to Cal State LA: Log in using Cal State LA email address and password.
- The device will go through setup process. This could take a while and the device may reboot. Allow the computer to finish.
- Once the computer has finished setup process, it will be ready to use.
- Microsoft Office 365 is preinstalled but will be available in the Company Portal for upgrade or additional features.
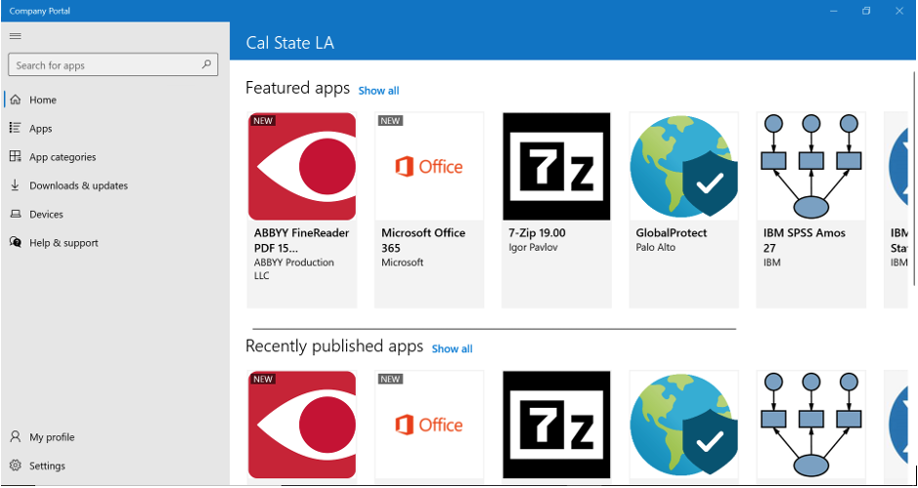
Applications can be downloaded using Company Portal App. The applications can be reinstalled via Company Portal at any time.
Note: You must be connected to the Internet to perform the procedure. Installation time will vary depending on the speed of your Internet connection and the network hardware on your Windows laptop.
- Type "Company Portal" in the search bar in located in the lower-left corner of Windows desktop.
- Choose the best category: Loaner-Employee
- Applications available in Company Portal:
- 7-Zip
- AdobeCC Self Service
- ABBYY FineReader PDF 15
- Camtasia 2020
- GlobalProtect VPN (Virtual Private Network)
- IBM SPSS Amos 27
- IBM SPSS Statistics 27
- Microsoft Office 365
- Snagit 2020
- Zoom
MAC Laptop
Please follow the steps below before you start to use device. Plug-in the charger and power on your macOS device.
- Power on the new or reset macOS device.
- Select your preferred language and region.
- Connect to a network.
- Select a Wi-Fi network and enter the password if prompted.
- A network connection is required to continue enrollment.
- Proceed through the Apple Setup Assistant screens.
- Enroll the device in management.
- When prompted for Device Management, select Enroll.
- Sign in with your MyCalStateLA account.
- Enter your MyCalStateLA email address and password.
- Complete any required multi-factor authentication (MFA) prompts.
- Configure Platform Single Sign-On (SSO).
- Follow the on-screen prompts to complete the SSO setup.
- Create your local macOS password.
- Create a password for your local macOS account.
- This password is separate from your MyCalStateLA account password.
- Wait for automatic configuration.
- The device will automatically install required campus applications and settings.
- Applications installed automatically include:
- Google Chrome
- Mozilla Firefox
- Zoom
- Microsoft Office
- Microsoft Defender
- Adobe Creative Cloud Desktop
- Complete setup.
- After configuration is complete, the desktop will appear and the device will be ready for use.
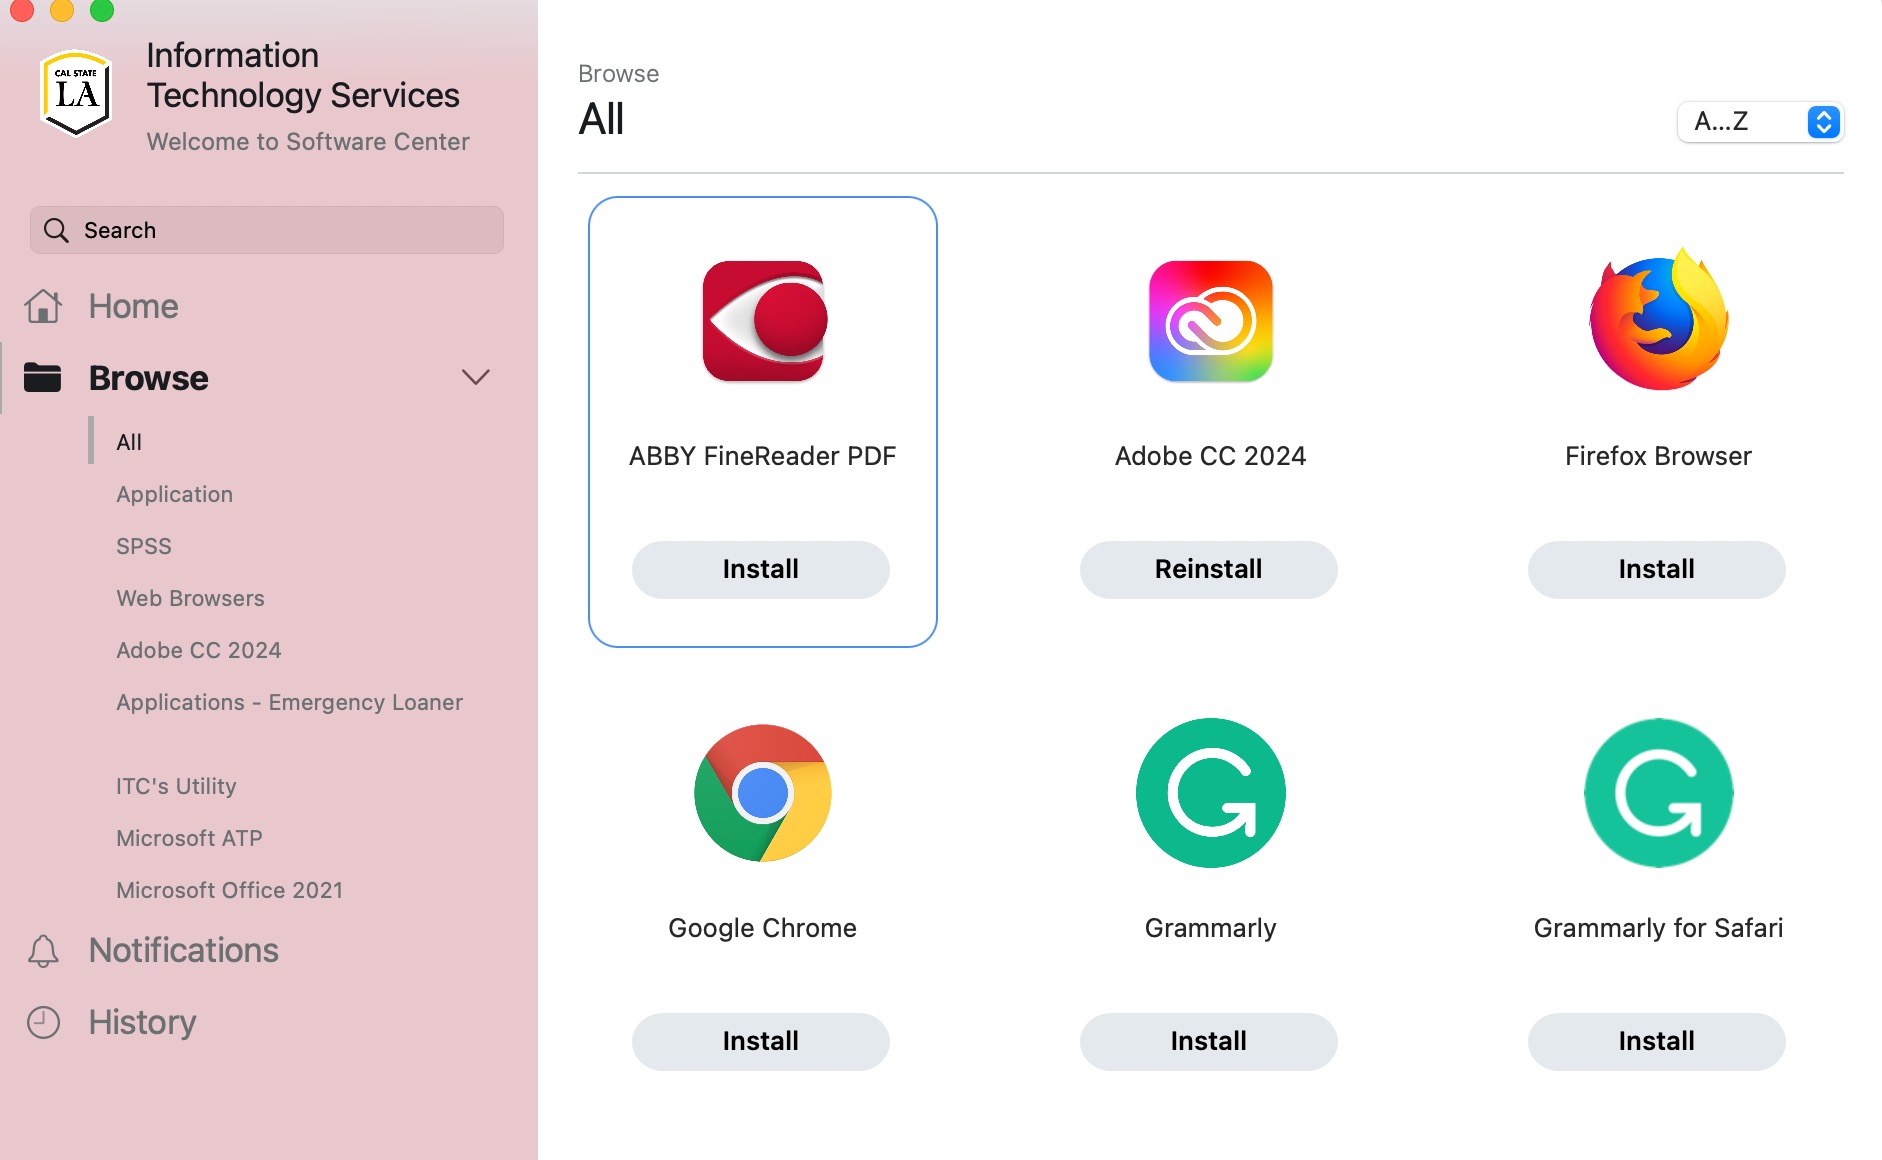
Updates on campus Macs are now done using the Software Center App located in the Mac OS Applications folder. The applications can be reinstalled via Software Center at any time.
Note: You must be connected to the Internet to perform the procedure. Installation time will vary depending on the speed of your Internet connection and the network hardware on your Mac.
-
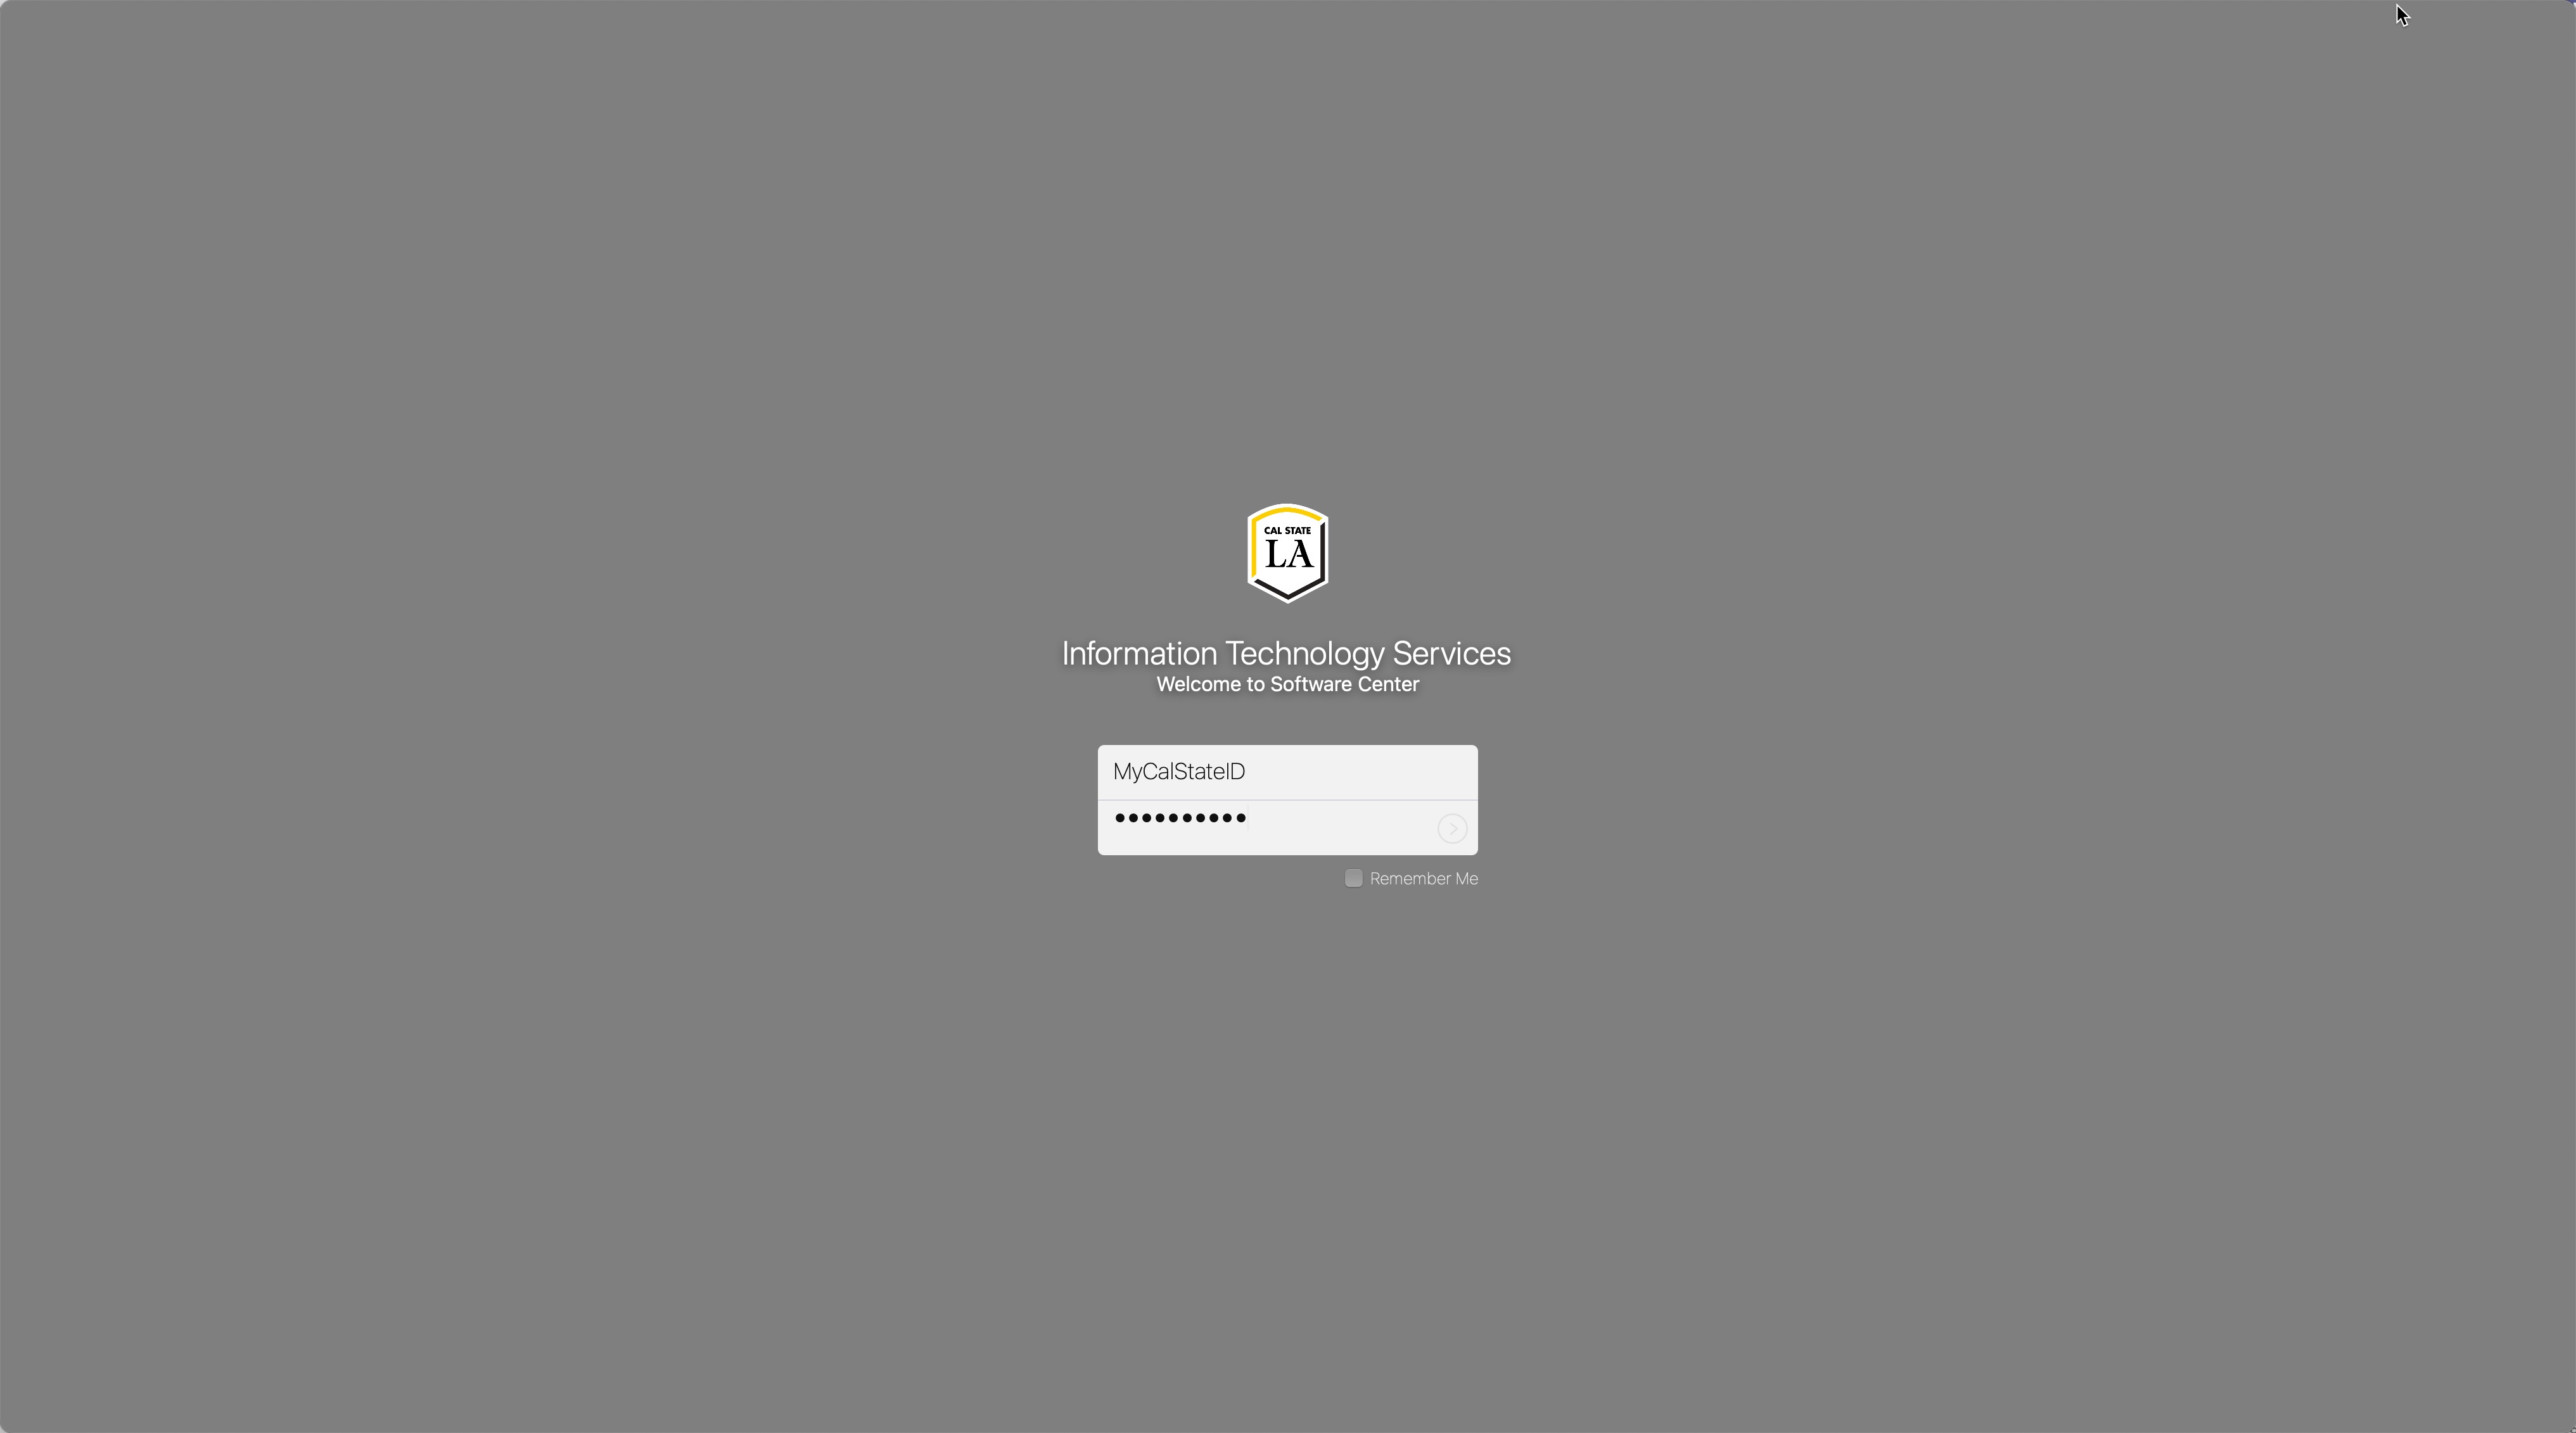
Launch the Software Center app in the Applications folder.

-
Login to Information Technology Services using your CalStateLA ID (myuserID).
-
Click Install for every application you want to install.
Available Applications:
- ABBY FineReader PDF
- Adobe CC 2024 (Adobe Cloud Desktop)
- IBM SPSS Statistics 29
- Microsoft Office 2021
- TechSmith (Camtasia 2024, Snagit 2024)
- Web Browsers (Firefox, Google Chrome)
- Global Protect – VPN Client
- Microsoft Remote Desktop
- Grammarly
- Microsoft Teams
- Zoom Meeting Client