Making Content Accessible For Your Classmates
Making content accessible for other students is important for several reasons:
-
Equity: Accessible content ensures that all students, regardless of their abilities or backgrounds, have equal access to learning materials.
-
Collaboration: When content is accessible, it fosters a more inclusive environment where all students can participate, collaborate, and contribute effectively.
-
Diverse Learning Needs: Students have varied learning styles and needs. Accessible content accommodates these differences, enhancing comprehension and engagement.
-
Preparation for the Future: Learning to create accessible content prepares students for professional environments, where inclusivity and accessibility are increasingly valued.
-
Community Building: Making materials accessible encourages a sense of community and support among students, promoting a culture of empathy and understanding.
-
Compliance and Awareness: Understanding accessibility helps raise awareness about legal and ethical responsibilities regarding inclusivity in education.
By prioritizing accessibility, students not only enhance their own learning but also support their peers, creating a more effective and inclusive educational experience for everyone.
Where To Make Your Content Accessible
To make your discussion post in Canvas accessible using the Rich Content Editor, follow these tips:
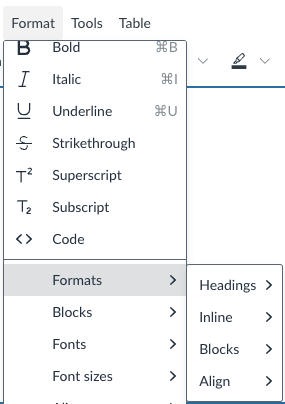
1. Use Headings and Subheadings
- Use headings (e.g., Heading 1, Heading 2) to structure your content. This helps with navigation for screen readers.
2. Alt Text for Images
- If you include images, provide descriptive alt text. This allows visually impaired users to understand the content. Once you embed the image, there will be an option to include alt-text.
3. Clear and Simple Language
- Use straightforward language and avoid jargon to ensure comprehension for all readers.
4. Proper Formatting
- Use bulleted or numbered lists for better readability. Avoid long paragraphs.
5. Contrast and Color Use
- Ensure good contrast between text and background colors. Avoid using color alone to convey information.
6. Descriptive Links
- Use clear and descriptive text for hyperlinks instead of "click here." This helps users understand the link's purpose.
- Example: Instead of using "Click Here!", phrase it to say "To get to the CSULA homepage, please click on this hyperlink provided!"
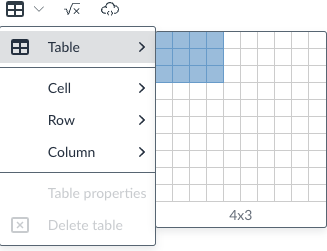
7. Tables for Data
- If using tables, ensure they are simple and include headers to make the information clear.
8. Avoid Excessive Formatting
- Limit the use of bold, italics, or other formatting to avoid distractions.
9. Check Accessibility Tools
- Use any built-in accessibility checker in Canvas to identify and fix potential issues.
10. Provide Transcripts for Multimedia
- If you include videos or audio, provide transcripts to ensure all students can access the information.
By following these guidelines, you can create a discussion post that is accessible to all student peers, promoting a more inclusive learning environment.
Panopto is a video platform primarily used for lecture capture, video management, and online learning. It allows educators to record, upload, and share videos, making it easier for students to access course materials. If you would like more information about Panopto, please click on this link.
To make your Panopto content accessible, follow these guidelines:
1. Use Captions
- Enable automatic captions and review them for accuracy. You can also upload a transcript to improve accessibility.
2. Provide Alt Text for Images
- When using images in your recordings or presentations, ensure they have descriptive alt text.
3. Clear Audio
- Use a good quality microphone and speak clearly to enhance audio accessibility.
4. Visual Contrast
- Ensure that slides or visuals have high contrast between text and background colors for better readability.
5. Simple Language
- Use straightforward language and avoid jargon to make content easier to understand.
6. Structured Content
- Organize your presentation logically, using headings and bullet points to enhance clarity.
7. Interactive Elements
- If applicable, incorporate quizzes and interactive elements that can help engage all learners.
8. Testing Accessibility
- Utilize accessibility checkers or tools to review your content for potential issues.
By following these steps, you can create accessible Panopto content that benefits all learners.
To make a Zoom meeting more accessible, consider the following strategies:
1. Enable Accessibility Features
- Closed Captioning: Use the built-in closed captioning feature or enable third-party captioning services.
- Screen Reader Compatibility: Ensure participants know Zoom is compatible with screen readers.
- Use Chat Functionality: Use the chat function to communicate in the instance you are having mic issues.
2. Use Clear Language
- Speak clearly and avoid jargon. Encourage participants to do the same for better understanding.
3. Encourage Use of Video
- Encourage participants to turn on their cameras to facilitate visual cues and engagement.
4. Manage Audio Quality
- Use a good microphone and minimize background noise. Encourage participants to mute when not speaking.
5. Record the Meeting
- Record sessions (with consent) for those who may need to review the content later.
By implementing these strategies, you can create a more inclusive environment for all participants in your Zoom meetings.


