Getting Started with Adobe Sign
Getting Help with Adobe Sign Issues
Instructor-Led Workshops
Visit the Workshops page for a list of upcoming Adobe Sign workshops or to request a Group Administrator workshop.
On-Demand Training
Introduction to Adobe Sign
This is a canvas course, this training focuses on the features and advantages of Adobe Sign as an e-signature solution. You will learn how to log in, customize user preferences, send an agreement for e-signature, manage an agreement, and handle an agreement.
Adobe Sign Group Administrator
This is a canvas course; this training provides more in-depth training focusing on the responsibilities and tasks exclusively handled by the Adobe Sign Group Administrators. This includes creating templates, web forms, managing group members, and creating workflow.
Adobe Sign Best Practices
Here are some recommendations for handling documents before sending the agreement.
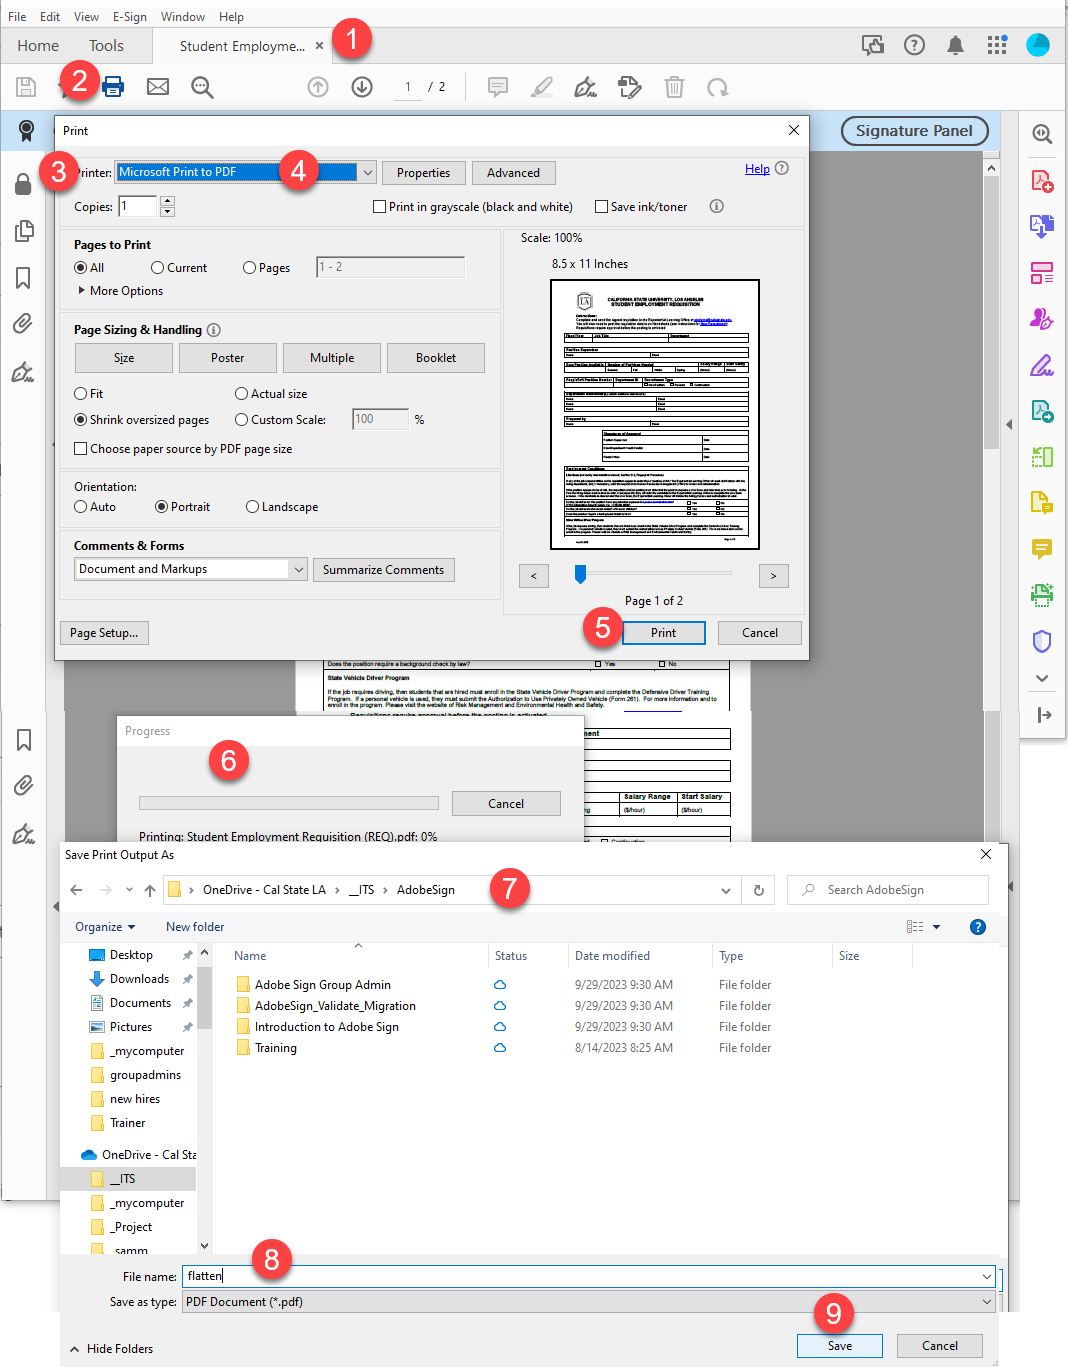
To Flatten a PDF:
- Open the file in a browser or Adobe Sign
- Click the Printer Icon
- The Print Dialog box opens
- Select Microsoft Print to PDF on the Printer drop-down list.
- Click the Print button to print the file
- The progress windows open
- Select the location for the print file
- Name the printed PDF in the File name: box
- Click the Save button to save the file.
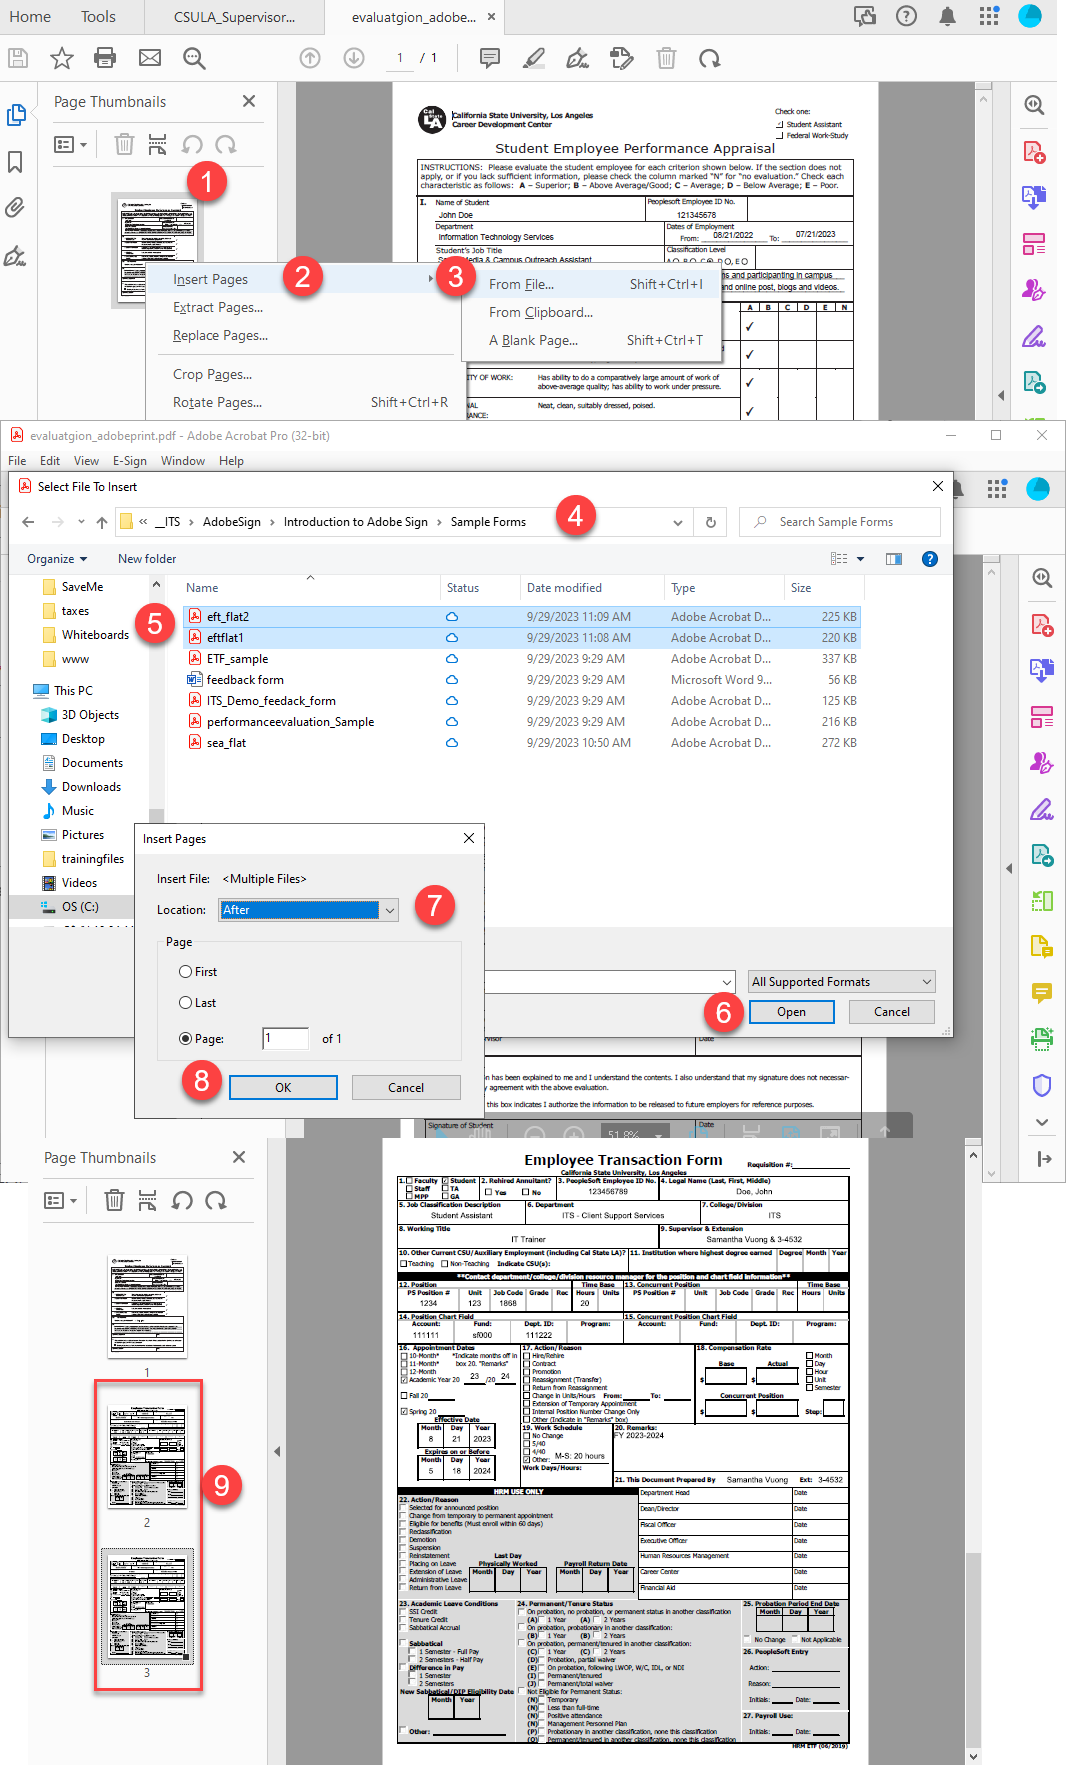
To combine multiple files, you can use Adobe Acrobat to help you.
- Open the Page Thumbnails
- Right-click on the first page, a shortcut menu open, select Insert Pages
- You can insert files from File..., From Clipboard, a Blank page. Select From Files...
- the Select File to Insert Open, locate the The file location,
- Select the files you want to insert.
- Click the Open button to add the files
- Choose where to add the Files, file can be added to the beginning or the After
- Click the Ok button to insert pages
- The pages are added to the page Thumbnails
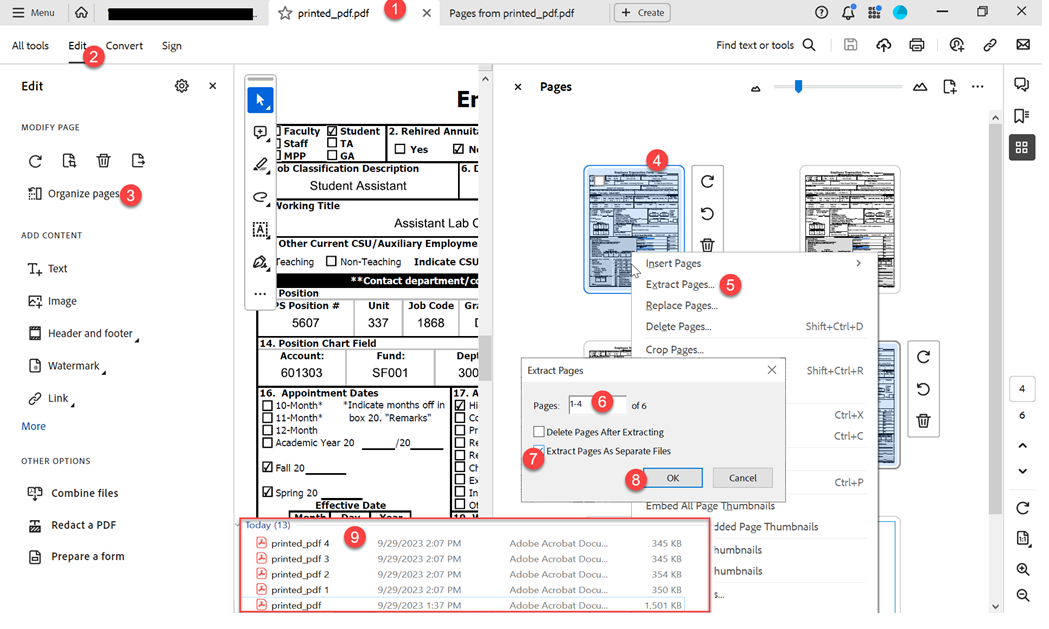
Instead of rescanning the files, you can extract the package and export them to individual files.
Note: All signed agreements are legally binding. When performing this task, the agreement will lose its certificate.
Here are the instructions to Extract the PDF files.
- Download the PDF from AdobeSign
- Then flatten the file – select Print command - Microsoft Print to PDF
- Open the Flatten file –
- Open the Edit menu
- Select Organize Pages
- right-click on the page
- Select Extract Pages…
- Enter the pages you want to Extract – 1-4 (will extract all four pages)
- Select Extract Pages as Separate Files
- Click the OK button
- Check your download location for the extracted Files
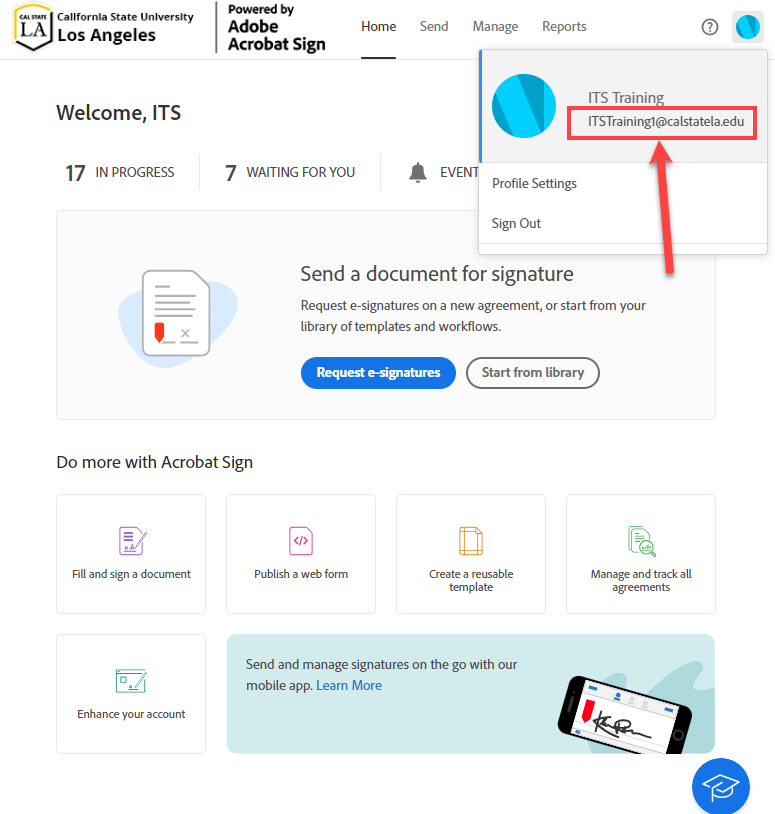
It is best to check the email account in Adobe Sign and share the email address with others.
Since our campus has two subdomains, cslanet or exchange, when sending the agreement without the subdomain, the user will get the email to sign the agreement, but it will not appear in the AdobeSign Portal Manage tab.
Using the indicated email in the profile guarantees you can manage the agreement in the AdobeSign Portal.
Reduce the file size using Adobe Acrobat
- Open a PDF in Acrobat.
- From the File menu, select Save As Other > Reduced Size PDF.
- Choose the location to save the file and select Save. Acrobat displays a message showing the successful reduction in PDF size.
Compress your files using Adobe PDF
Visit the Adobe Training for more Support