Plan your schedule ahead of time via your Enrollment Validation. Enrollment Validation is typically available to you a few weeks prior to your actual Enrollment Appointment.
Think of Enrollment Validation as creating a "rough draft" of your schedule. You can get most of the work finished ahead of time. Students who plan schedules ahead of time encounter fewer last-minute problems and are more likely to get the classes and times they prefer.
Use Enrollment Validation to:
- Plan your schedule via Schedule Planner ahead of time
- Verify the courses are available for enrollment
- Identify additional steps required before enrollment (1class permits, consent, prerequisite, time conflict, etc.)
- Help avoid last minute problems getting courses. You will need to check your schedule regularly because courses may fill up with students who have earlier appointment times, so your schedule is not guaranteed until you actually complete enrollment.
With your schedule set, shopping cart validated, and permits in place, you can quickly finish enrolling when your Enrollment Appointment day and time arrive. Note: validating your schedule does not reserve seats for you in the classes.
To access Schedule Planner:
- Navigate to the Student Center within GET (see prior instructions if you don't know how to do this).
- Click on the Schedule Planner link.
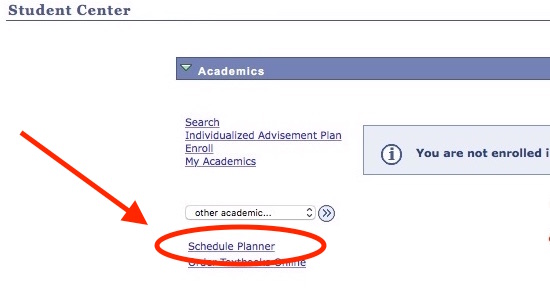
- Schedule Planner will open in a new window. (Note: You may need to disable the pop-up blocker on your web browser, since Schedule Planner will start as a pop-up window.)
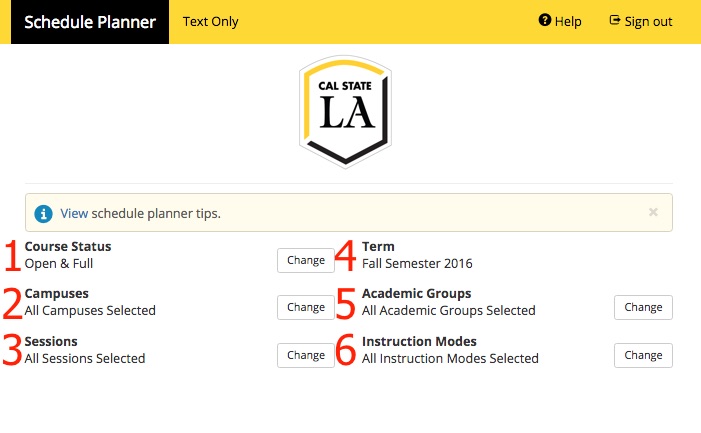
- Course Status: Click here to choose whether to include full and/or waitlisted classes in your search.
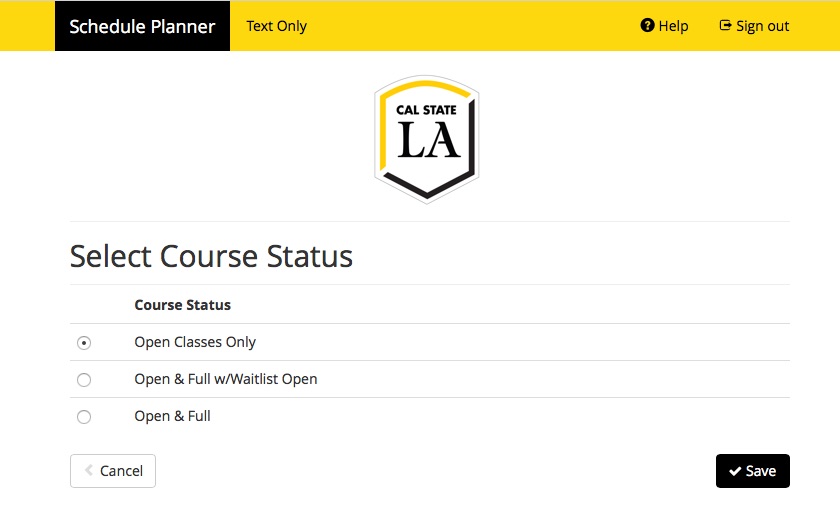
- Open Classes Only: Only choose classes that still have space
- Open & Full w/Waitlist Open: Choose open classes and classes that still have space on the waitlist
- Open & Full: Choose all classes, regardless of whether there is space available
- Academic Groups: Click here to choose what colleges and Academic Groups you want to include in your class search. Use the checkboxes to the left of each Academic Group to select or deselect that group.

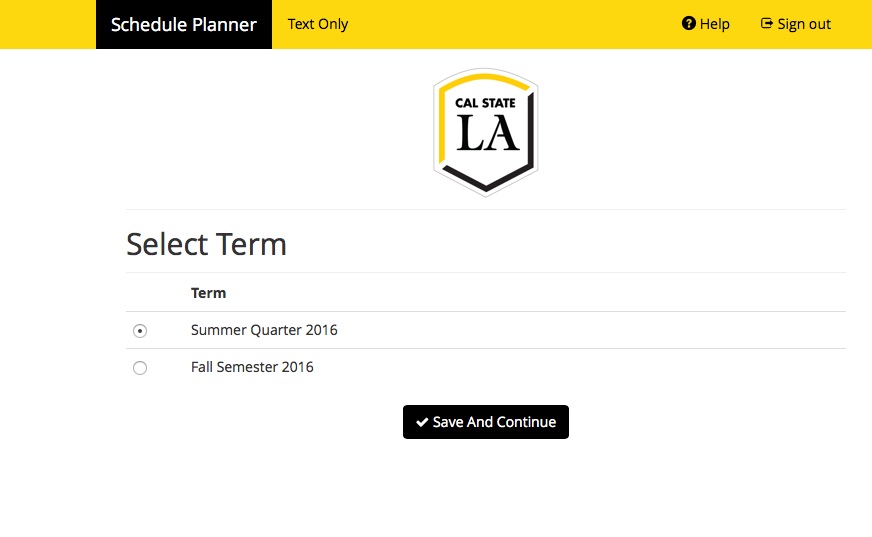
- Term: Make sure the correct term is listed here.
- Instruction Modes: Click here to choose between traditional classes, online classes, and hybrid classes.
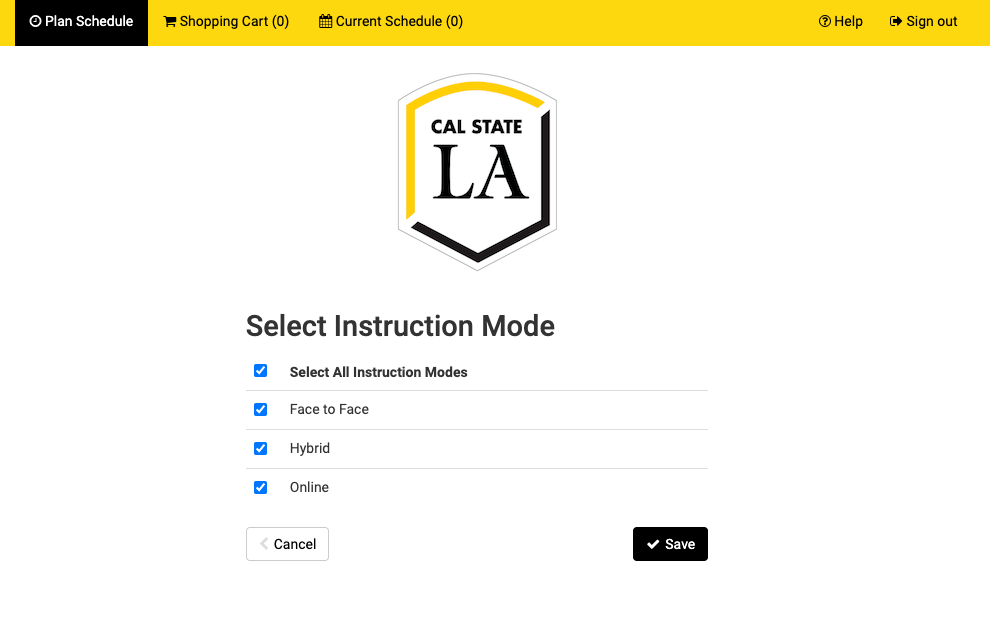
- Select All Instruction Modes: View all classes regardless of format
- Face to Face: Limit to non-online, traditional in-class courses
- Hybrid: Limit to Hybrid courses
- Online: Limit to online courses
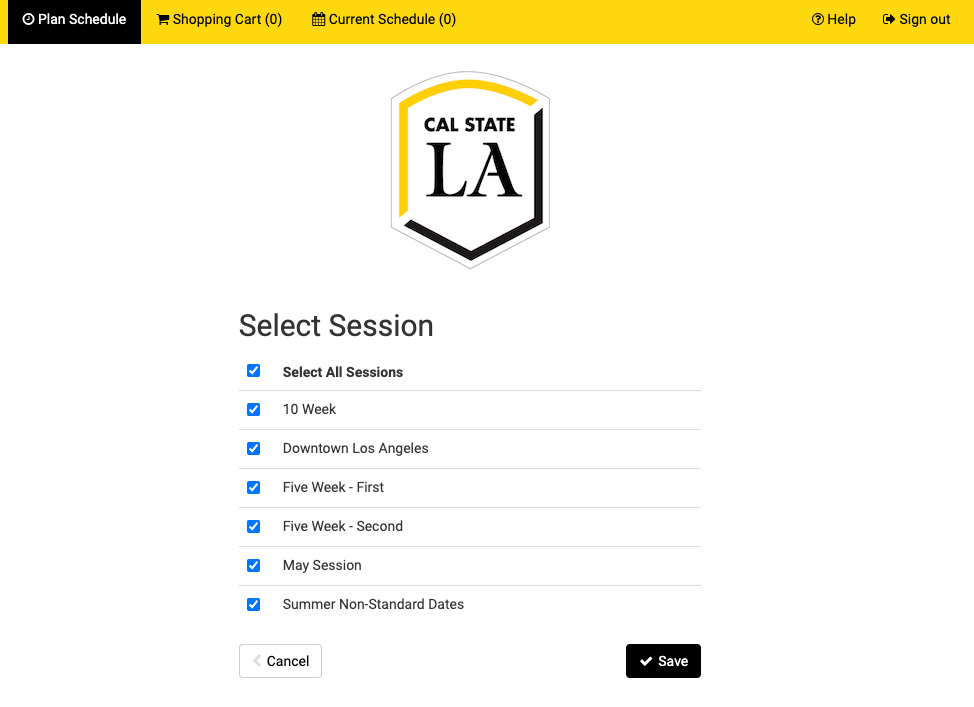
- Sessions: Allows you to select specific Sessions during terms where classes are offered. This is particularly valuable during Summer Term which has many sessions, e.g. 10 week, May Session, etc.
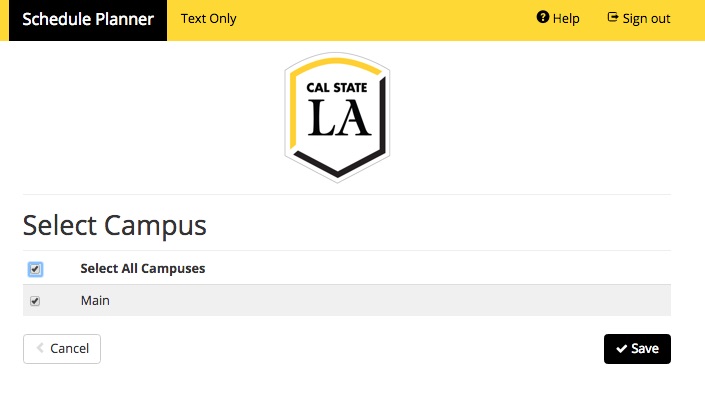
- Campuses: Normally leave this to "All Campuses Selected".
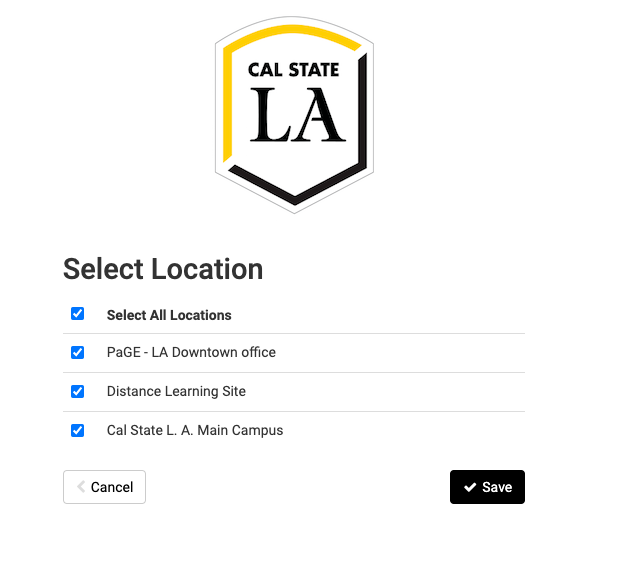
- Locations: Allows you to select from specific instruction locations.
- Careers: Allows you to select from specific Careers (Undergraduate, Graduate, Doctor of Education)

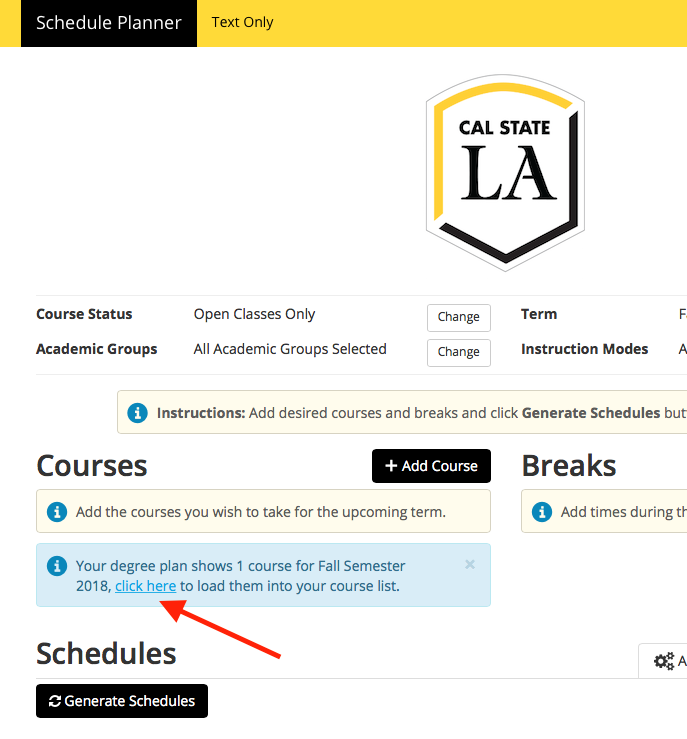
In some cases Schedule Planner will find courses that were added in Degree Planner. For more information on Degree Planner including which majors are available and who is eligible, visit the Degree Planner website.
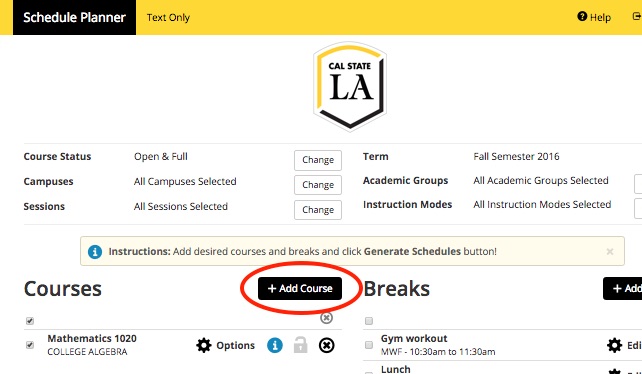
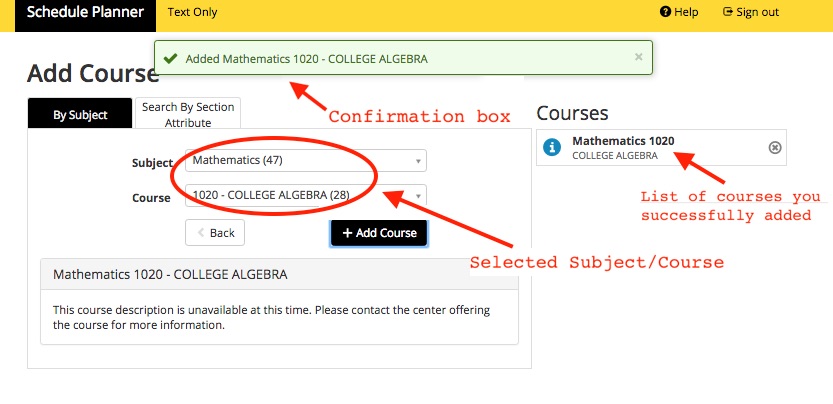
- Click the black Add Course button
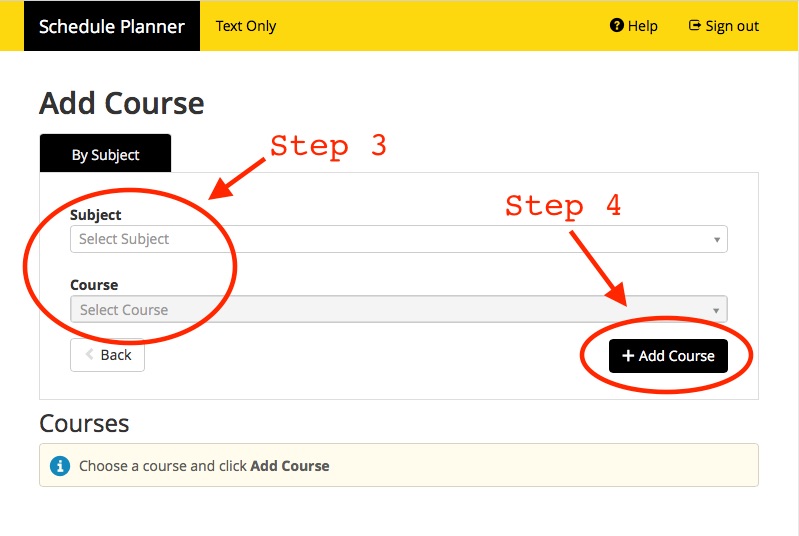
- You will see the Add Course screen.
- From the drop-down box under By Subject, select the subject/department that contains the course you want to add. Then, from the drop-down box under Course, select the course you want to add to your schedule.
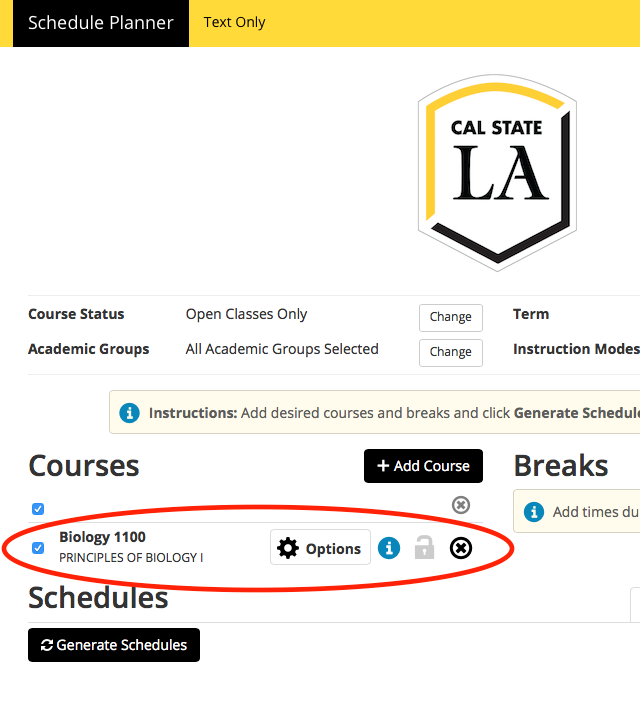
- Once you click the black Add Course button, a green box will appear at the top of the screen confirming you have successfully added the course to your schedule. You can also click the blue i circle next to the added courses to view details on that course, such as prerequisites and course content.

- You can search by Course Attribute. This tab lets you select specific types of courses, like General Education (GE) requirements, CSU Fully Online, service learning (usually Child Development), or Technologically Mediated (e.g. some Accounting, Nursing). You can select more than one option for more advanced filtering. Under this tab you can filter for Online, Hybrid or Face-to-face instruction modes.
You can also search for Zero-Cost Course Material courses (ZCCM) by selecting ZCCM under Course Attributes. All CSU campuses are required to identify course sections that exclusively use digital course materials that are free of charge to students and which may have lost-cost print options. Sections meeting these qualifications are identified by the respective academic department and are referred to as Zero Cost Course Material (ZCCM) sections.
- You can search by Instructor.

- You can search by Class Number. If you know the specific Class Number, enter it here and add the class to your Courses list.

- When you are done adding classes, click the Back button to return to the main screen.
- Click the black Add Break button.

- You will see the Add New Break screen. Here you can give your break a name (e.g. lunch, workout, volunteering, etc) and specify the start/end times and day(s) you want the break in your schedule.

Pictured is the Break screen with a break filled out for lunch from 12-1pm on MTuWThF. - When you click the black Add Break button, you will be returned to the main screen, and the break(s) you have entered will be listed in the Breaks section.
- You can also add Class Padding, which adds minutes between classes to allow you time to travel. Access this on the main Schedule Planner page, under the Advanced Options tab.

Once you add your courses plus optional breaks/padding, click the black Generate Schedules button to create your schedule. You will now see all the possible schedules you can have, given the courses and breaks/padding you entered. Tip: If you get too many possible schedules, consider adding more courses or breaks to lower the number of possibilities.

Click the View link next to one of the schedules to show you the schedule on a calendar. You can browse through the available schedules by clicking the forward and back arrows at the top right of the calendar.
If you select 2 or more schedules, you can quickly compare them. A Compare button will appear, and if you click it you will see mini versions of the schedules you have selected.


Clicking the lock icon (labeled 1) on a course will choose that course to be in your final schedule. This usually reduces the number of possible schedules offered to you. You will see the number of schedules at top right (labeled 2) go down, sometimes by a lot! Locking additional classes will again reduce the number of possible schedules.

At the top, above the day/time calendar of your schedule, is a list of courses which includes their section number, days/locations, and whether you have locked them into your schedule.

While you are viewing a potential schedule, you can Validate the schedule to see if there are potential issues that might prevent you from enrolling. For instance, you might need department consent to take a course, or you may not have completed the prerequisites needed to enroll in the course you're hoping to add.
- Click the Validate button to Validate your schedule.
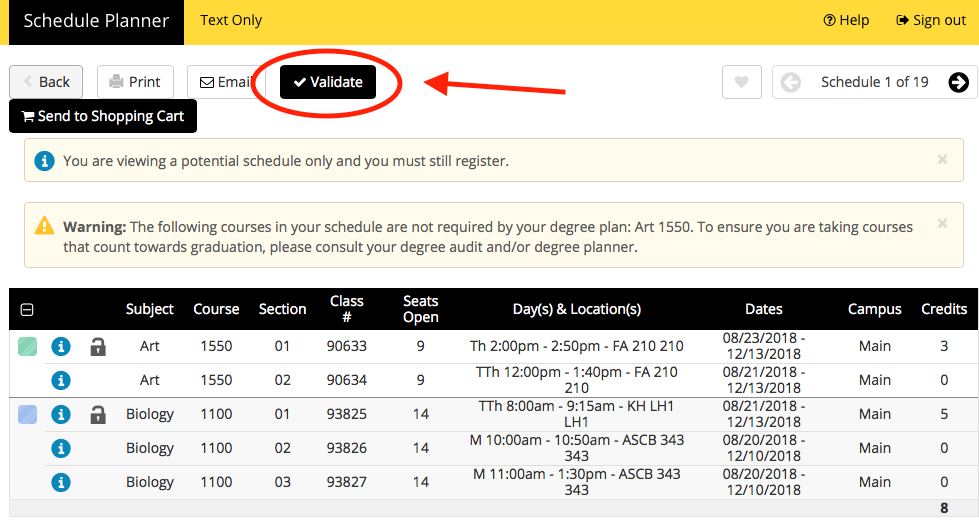
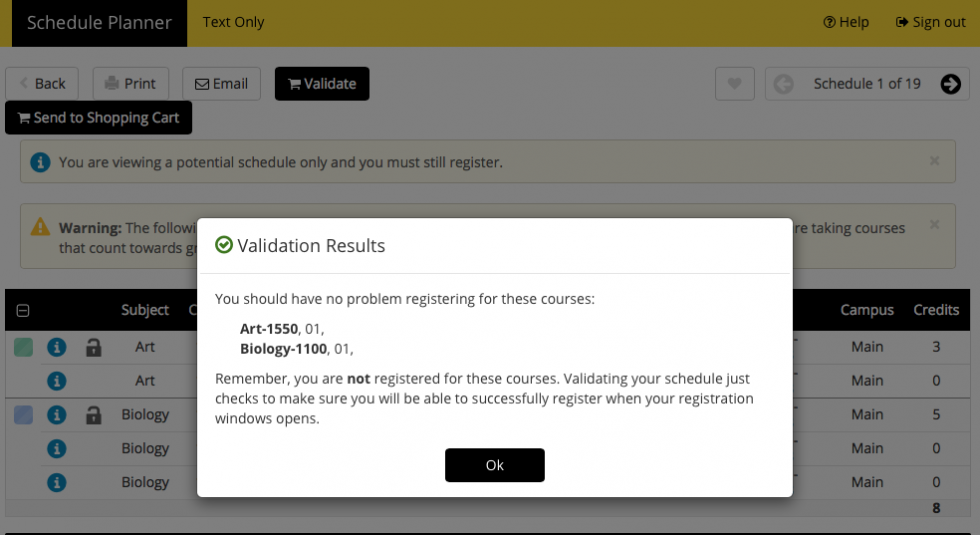
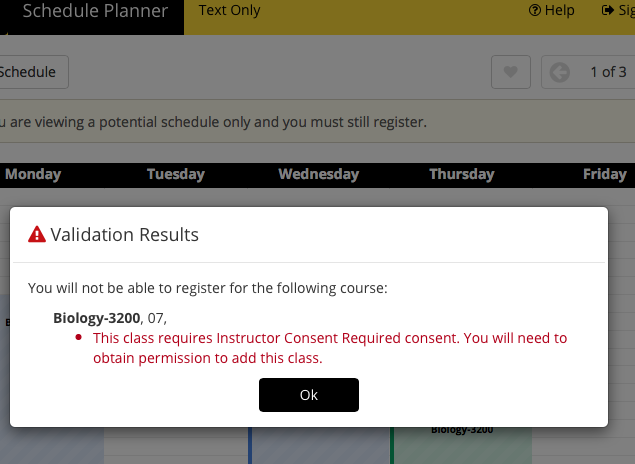
- You will see a dialog box appear with your Validate Schedule results.
- In this example, Validate Schedule did not find any potential issues
- In this example, Validate Schedule found a course that requires Instructor Consent. In this case, your next step would be to obtain that consent before adding the course
- In this example, Validate Schedule did not find any potential issues
If you find a schedule that you like, you can save it as a Favorite Schedule by clicking on the heart icon at the top right. A window will pop up asking you to name your schedule. You will be able to return to this schedule from the main screen under your Favorites.

It's possible that class sections you have selected may become unavailable; for example, students with earlier appointments may fill up available seats. It is important that you check back and Validate your schedule periodically to make sure that the sections you want are still available.