The Cal State LA wireless networks support all the latest devices and Wi-Fi protocols. Students, faculty and staff can access the CSULA-SECURE wireless network using their MyCalStateLA ID username and password. The settings described here are only for users who have a Cal State LA AD domain account. For all other wifi access, including guest access, navigate to: /its/network/wireless.
These settings are for the current Windows 10 OS. For other Windows versions, the locations to these settings will be different, but the settings can be configured the same depending on your desired situation.
Begin WiFi Setup
- Right-click the WiFi icon in the Taskbar, usually bottom right corner of the screen.
- Click on "Open Network & Internet Settings"

This window can also be accessed from: Start > Settings > Network & Internet.
If you are setting up the WiFi for the first time and know that the CSULA-SECURE WiFi profile is not on the laptop/PC, then go to the Add CSULA-SECURE WiFi section. Otherwise follow the next step to check for the existing WiFi profile and delete it so that a new profile with the correct settings can be created.
The following settings can be changed according to various situations.
- Click on "Wi-Fi"on left:
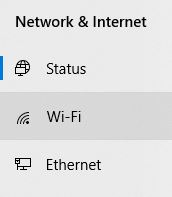
- Click on the "Manage known networks" on right:
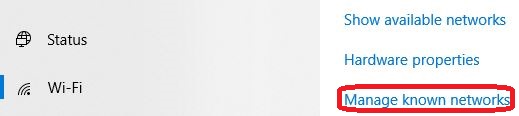
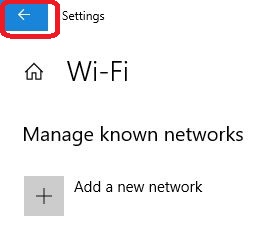
- Look for the CSULA-SECURE profile. If it does not exist, click on the blue left arrow at the top left corner of the window to go back to the previous window:
-
Otherwise, If it exists, follow the Remove CSULA-SECURE WiFi Profie section below to remove it.
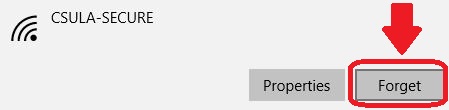
- Click on CSULA-SECURE
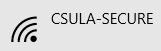
- Then Click on "Forget" to remove the existing CSULA-SECURE WiFi profile.
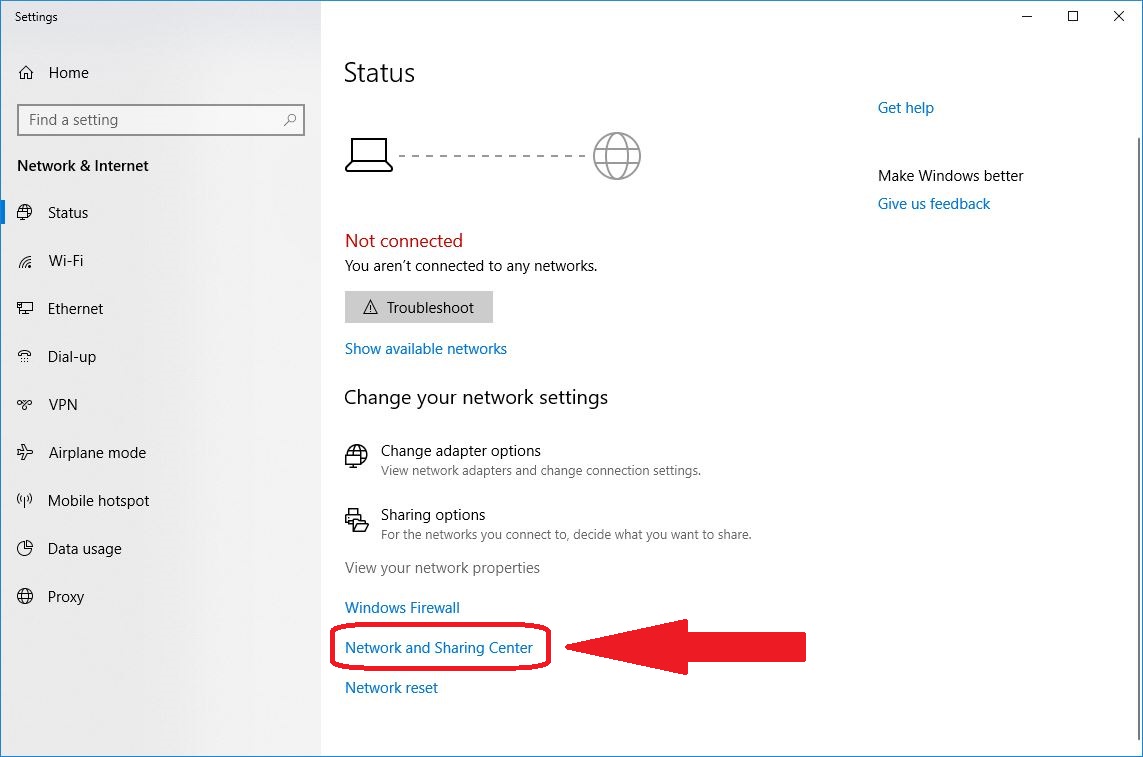
- Click on the blue left arrow at the top left corner of the window to go back to the previous window:
- Click on "Network and Sharing Center"
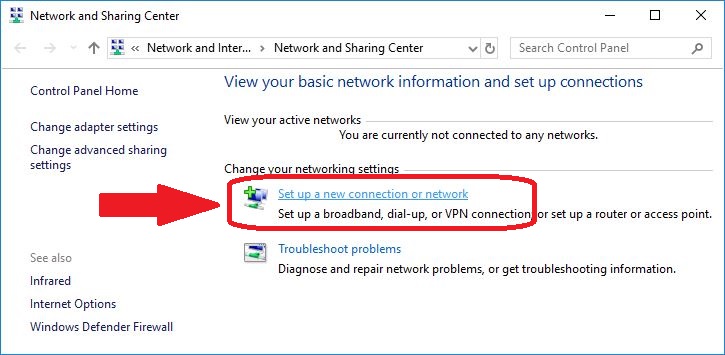
- Click on "Set up a new connection or network"
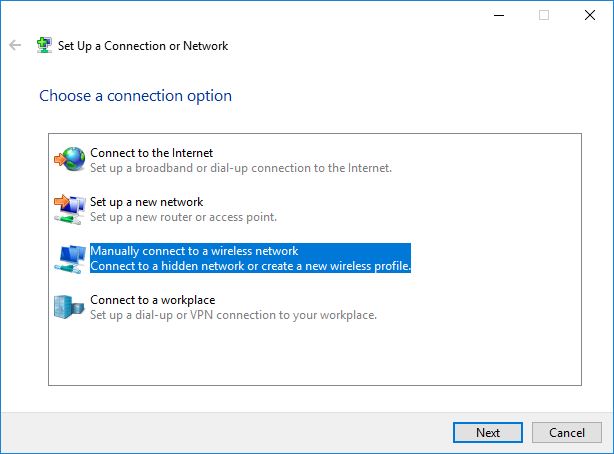
- Click on "Manually connect to a wireless network", then click on the Next button
- Enter the following info:
1. Network Name: CSULA-SECURE
2. Security type: WPA2-Enterprise
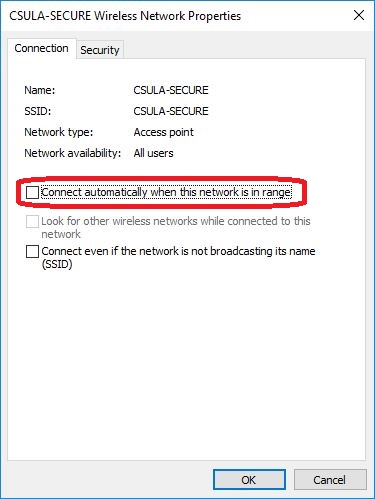
3. Un-check “Start this connection automatically”
Note: If this is left checked, the WiFi will start trying to connect to the CSULA-SECURE with the default, incorrect settings and will fail.
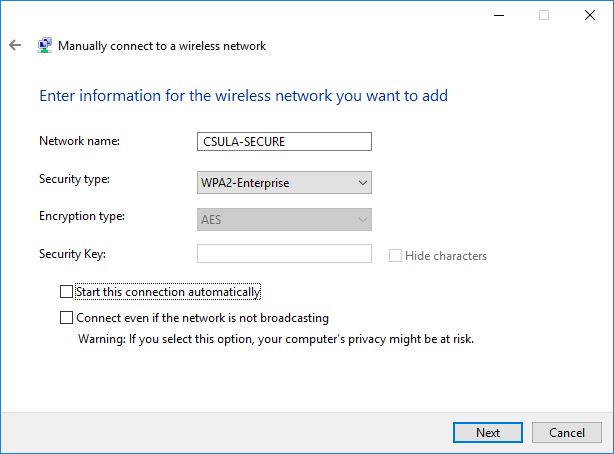
4. Click the Next button
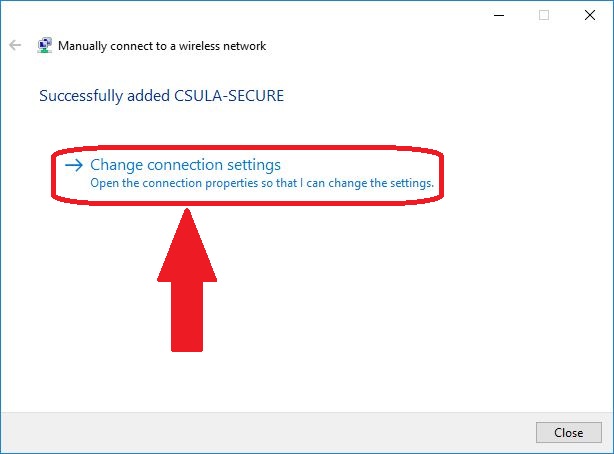
- Click on "Change connection settings"
Choose one of the setup options below, then go to the corresponding section to see how to configure the WiFi.
- Saving credentials
After your are done with the Post Config, remember to change the WiFi setting to your desired setup so that your credentials will be deleted.. - Prompt for credentials
If you want the laptop/PC to prompt for credentials everytime, then you can leave this setting alone after Post Config. However, you will need to enter your credentials on each step of the Post Config in order to join the AD domain wirelessly.
Setup seamless login for campus PCs already joined to the domain
This setup if for campus accounts to login to the laptop or PC wirelessly like they would on the wired network.
- On the WiFi Connection Tab, checkmark the "Connect automatically when the network is in range" option.
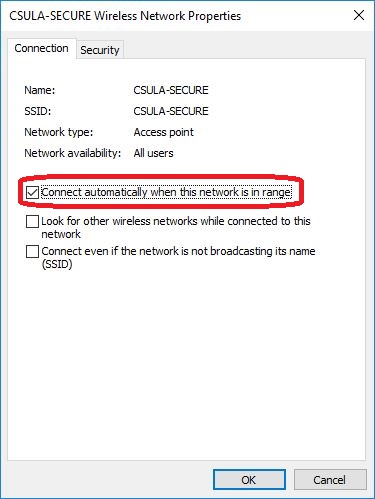
Then click on the Security tab
-
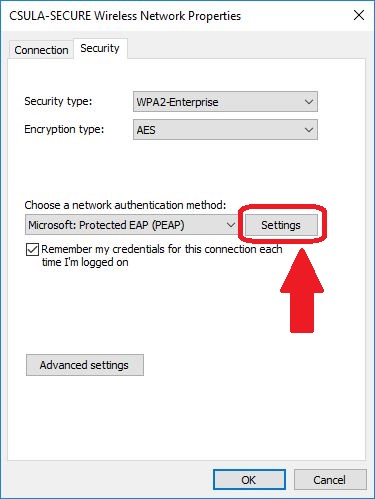
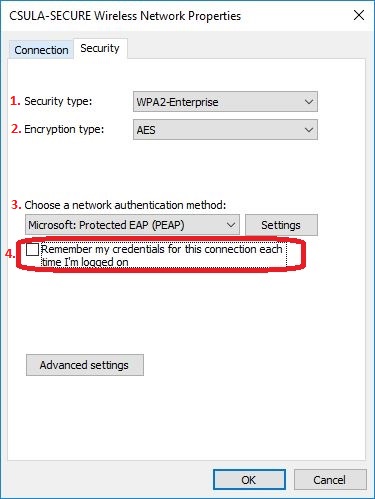
On the Security tab page, confirm these settings:
1. Security type: WPA2-Enterprise
2. Encryption type: AES
3. Choose a network authentication method: Microsoft: Protected EAP (PEAP)
4. Checkmark "Remember my credentials for this connection each time I'm logged on"
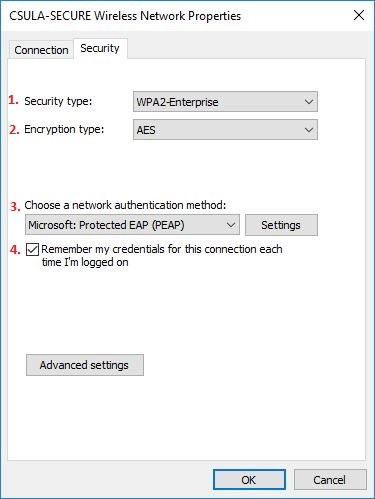
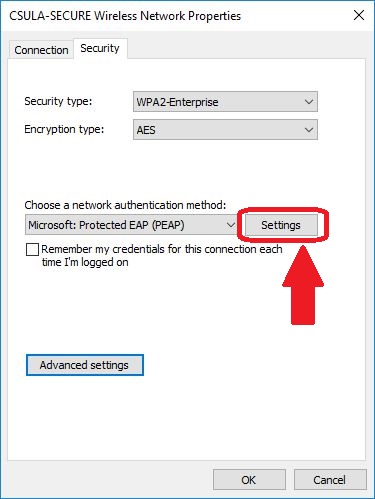
5. Click on the Settings button
-
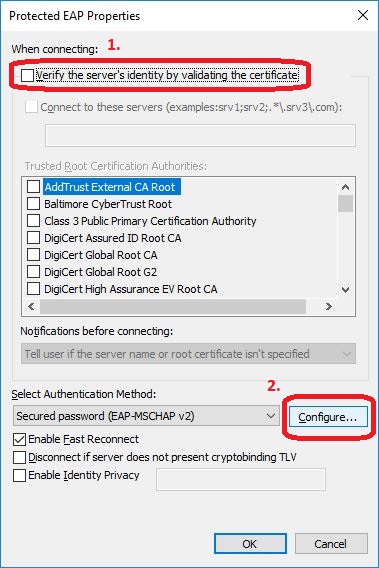
Configure the following settings in the Protected EAP Properties window:
1. When connecting: Un-check "Verify the server's identity by validating the certificate"
2. Select Authentication Method: Secured password (EAP-MSCHAP v2) and click on the "Configure..." button
On the Security tab page, confirm these settings:
1. Security type: WPA2-Enterprise
2. Encryption type: AES
3. Choose a network authentication method: Microsoft: Protected EAP (PEAP)
4. Checkmark "Remember my credentials for this connection each time I'm logged on"
5. Click on the Settings button
3. The "Enable Fast Reconnect" option can remain checkmarked. -
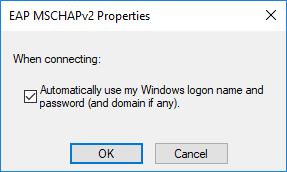
Checkmark "Automatically use my Windows logon name and password (and domain if any)." and click OK
On the Security tab page, confirm these settings:
1. Security type: WPA2-Enterprise
2. Encryption type: AES
3. Choose a network authentication method: Microsoft: Protected EAP (PEAP)
4. Checkmark "Remember my credentials for this connection each time I'm logged on"
5. Click on the Settings button
Click on OK to close this window.
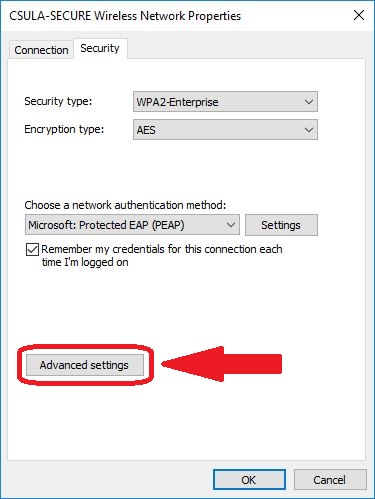
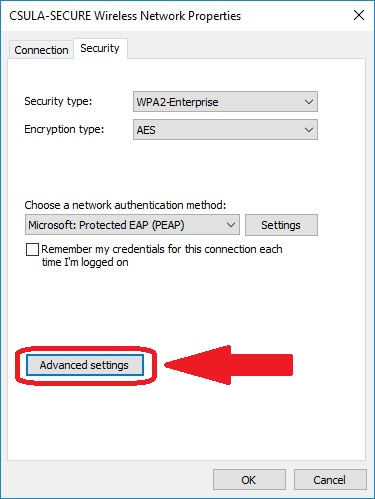
Click on OK again to close the Protected EAP Properties window. - On the Security tab page, click on the Advanced settings button
On the Security tab page, confirm these settings:
1. Security type: WPA2-Enterprise
2. Encryption type: AES
3. Choose a network authentication method: Microsoft: Protected EAP (PEAP)
4. Checkmark "Remember my credentials for this connection each time I'm logged on"
5. Click on the Settings button
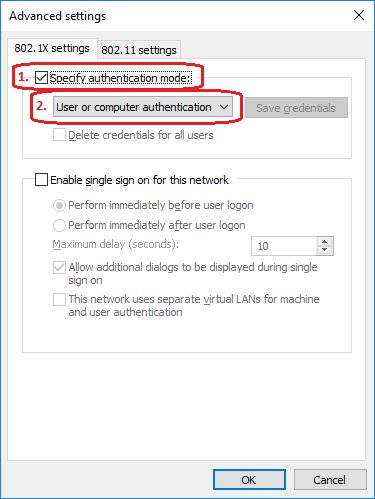
- Checkmark the "Specify the authentication mode:" option and select the "User or computer authentication" item from the dropdown list.
On the Security tab page, confirm these settings:
1. Security type: WPA2-Enterprise
2. Encryption type: AES
3. Choose a network authentication method: Microsoft: Protected EAP (PEAP)
4. Checkmark "Remember my credentials for this connection each time I'm logged on"
5. Click on the Settings button
Click on the OK button to close this window.
-
Click on the OK button again to close the Wireless Network Properties window.
All done! Now campus AD domain accounts can login to the laptop/PC at the login screen.
This setup is for local accounts (also to join PC to domain using WiFi during Post Config) or personal laptops/PCs, kiosks to temporarily save the login credentials to automatically connect to the CSULA-SECURE WiFi.
Caution: If the account credential gets locked out, disabled, password expired, or the owner changes the password, you will have to go to this setting page again to either update the password or change to a different setup.
- On the WiFi Connection Tab, checkmark the "Connect automatically when the network is in range" option.
Then click on the Security tab
-
On the Security tab page, confirm these settings:
1. Security type: WPA2-Enterprise
2. Encryption type: AES
3. Choose a network authentication method: Microsoft: Protected EAP (PEAP)
4. Checkmark "Remember my credentials for this connection each time I'm logged on"
5. Click on the Settings button
-
Configure the following settings in the Protected EAP Properties window:
1. When connecting: Un-check "Verify the server's identity by validating the certificate"
2. Select Authentication Method: Secured password (EAP-MSCHAP v2) and click on the "Configure..." button
On the Security tab page, confirm these settings:
1. Security type: WPA2-Enterprise
2. Encryption type: AES
3. Choose a network authentication method: Microsoft: Protected EAP (PEAP)
4. Checkmark "Remember my credentials for this connection each time I'm logged on"
5. Click on the Settings button
3. The "Enable Fast Reconnect" option can remain checkmarked. -
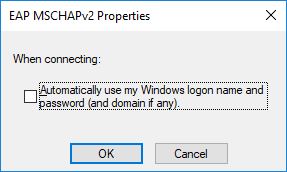
Un-Check "Automatically use my Windows logon name and password (and domain if any)." and click OK
On the Security tab page, confirm these settings:
1. Security type: WPA2-Enterprise
2. Encryption type: AES
3. Choose a network authentication method: Microsoft: Protected EAP (PEAP)
4. Checkmark "Remember my credentials for this connection each time I'm logged on"
5. Click on the Settings button
Click on OK to close this window.
Click on OK again to close the Protected EAP Properties window. - On the Security tab page, click on the Advanced settings button
On the Security tab page, confirm these settings:
1. Security type: WPA2-Enterprise
2. Encryption type: AES
3. Choose a network authentication method: Microsoft: Protected EAP (PEAP)
4. Checkmark "Remember my credentials for this connection each time I'm logged on"
5. Click on the Settings button
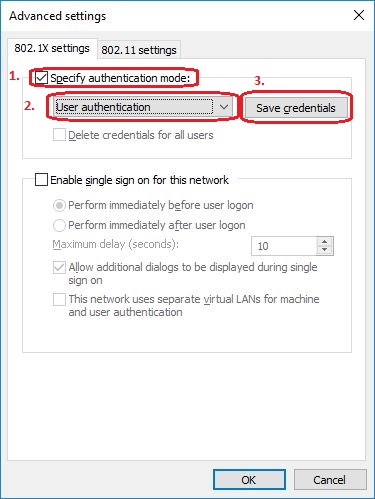
- In the Advanced settings window:
1. Checkmark the "Specify the authentication mode:" option
2. Select the "User authentication" item from the dropdown list.
3. Click on the Save credentials button
On the Security tab page, confirm these settings:
1. Security type: WPA2-Enterprise
2. Encryption type: AES
3. Choose a network authentication method: Microsoft: Protected EAP (PEAP)
4. Checkmark "Remember my credentials for this connection each time I'm logged on"
5. Click on the Settings button
4. Enter your User ID and password in the corresponding fields.
On the Security tab page, confirm these settings:
1. Security type: WPA2-Enterprise
2. Encryption type: AES
3. Choose a network authentication method: Microsoft: Protected EAP (PEAP)
4. Checkmark "Remember my credentials for this connection each time I'm logged on"
5. Click on the Settings button
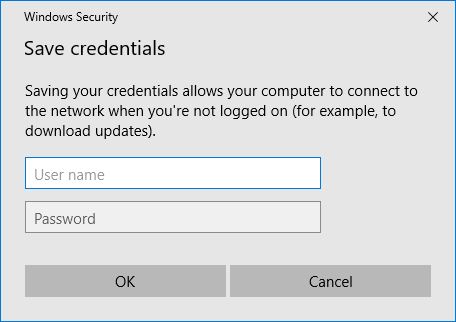
5. Click on the OK button to close the Windows Security window. Click OK again to close the Advanced settings window.
-
Click on the OK button again to close the Wireless Network Properties window.
All done! Now whenever the laptop/Pc boots up, it'll connect to the CSULA-SECURE with the saved credentials automatically. Remember, this is only a temporary setup, so remember to make any other change to the WiFi settings to automatically delete the saved credentials.
This setup is for local accounts (also to join PC to domain using WiFi during Post Config) or personal laptops/PCs to always prompt for the login credentials when connecting to the CSULA-SECURE WiFi.
Note: If this laptop/PC is already joined to the AD domain and you want to login with the campus AD account, then at the login screen, the WiFi needs to connect to the CSULA-SECURE first with the login credential, then after successful WiFi connection, the user can login again to the desktop.
- On the WiFi Connection Tab, Un-check the "Connect automatically when the network is in range" option.
Then click on the Security tab
-
On the Security tab page, confirm these settings:
1. Security type: WPA2-Enterprise
2. Encryption type: AES
3. Choose a network authentication method: Microsoft: Protected EAP (PEAP)
4. Un-Check "Remember my credentials for this connection each time I'm logged on"
5. Click on the Settings button
-
Configure the following settings in the Protected EAP Properties window:
1. When connecting: Un-check "Verify the server's identity by validating the certificate"
2. Select Authentication Method: Secured password (EAP-MSCHAP v2) and click on the "Configure..." button
On the Security tab page, confirm these settings:
1. Security type: WPA2-Enterprise
2. Encryption type: AES
3. Choose a network authentication method: Microsoft: Protected EAP (PEAP)
4. Un-Check "Remember my credentials for this connection each time I'm logged on"
5. Click on the Settings button
3. The "Enable Fast Reconnect" option can remain checkmarked. -
Un-Check "Automatically use my Windows logon name and password (and domain if any)." and click OK
On the Security tab page, confirm these settings:
1. Security type: WPA2-Enterprise
2. Encryption type: AES
3. Choose a network authentication method: Microsoft: Protected EAP (PEAP)
4. Un-Check "Remember my credentials for this connection each time I'm logged on"
5. Click on the Settings button
Click on OK to close this window.
Click on OK again to close the Protected EAP Properties window. - On the Security tab page, click on the Advanced settings button
On the Security tab page, confirm these settings:
1. Security type: WPA2-Enterprise
2. Encryption type: AES
3. Choose a network authentication method: Microsoft: Protected EAP (PEAP)
4. Un-Check "Remember my credentials for this connection each time I'm logged on"
5. Click on the Settings button
- In the Advanced settings window:
1. Checkmark the "Specify the authentication mode:" option
2. Select the "User authentication" item from the dropdown list.
On the Security tab page, confirm these settings:
1. Security type: WPA2-Enterprise
2. Encryption type: AES
3. Choose a network authentication method: Microsoft: Protected EAP (PEAP)
4. Un-Check "Remember my credentials for this connection each time I'm logged on"
5. Click on the Settings button

Click OK to close the Advanced settings window.
-
Click on the OK button again to close the Wireless Network Properties window.