
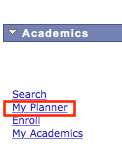
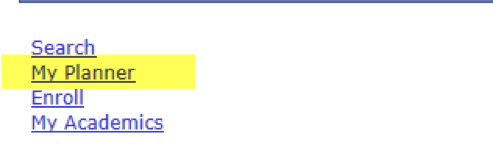
My Planner
Graduating in a timely manner is a top priority at Cal State LA. My Planner is a tool available to many students to assist them in their path to graduation.
If My Planner shows in your Student Center, you are eligible – just click it and get started. If you see Degree Planner instead please visit the Degree Planner website for more details.
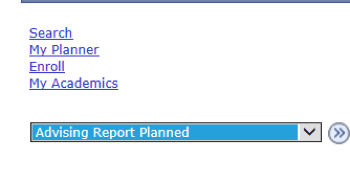
In the drop down menu, select Advising Report Planned and click on the circle button.
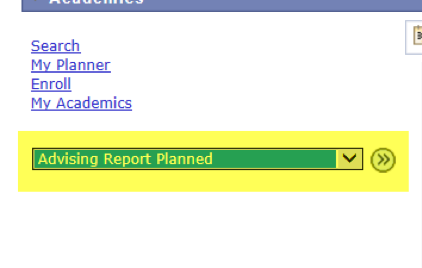
Click on the View Advising Report Planned button.

If you have used My Planner and added courses in the past it is important to maintain the plan. For example, if you planned courses but did not take them you must remove them from past terms so that you can add them to current and/or future terms.
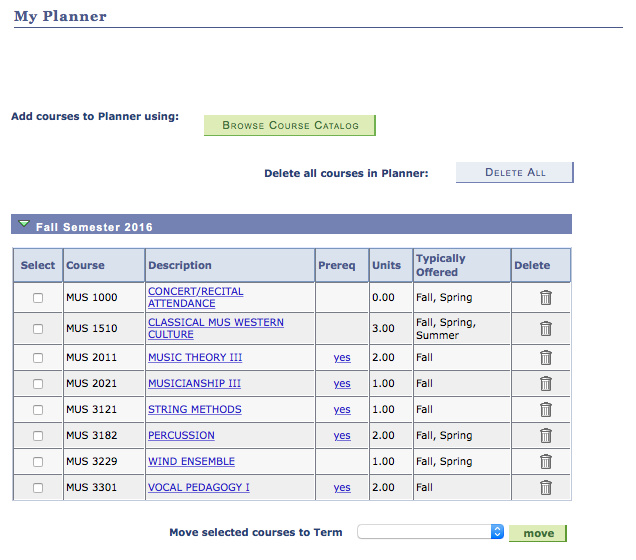
- Click the trash can icon to delete an individual course.

- To delete all courses in My Planner, click the Delete All button

Use Delete All with caution, as it will remove all of your courses!!
In the drop down menu, select Advising Report Planned and click on the circle button.
Click on the View Advising Report Planned button.
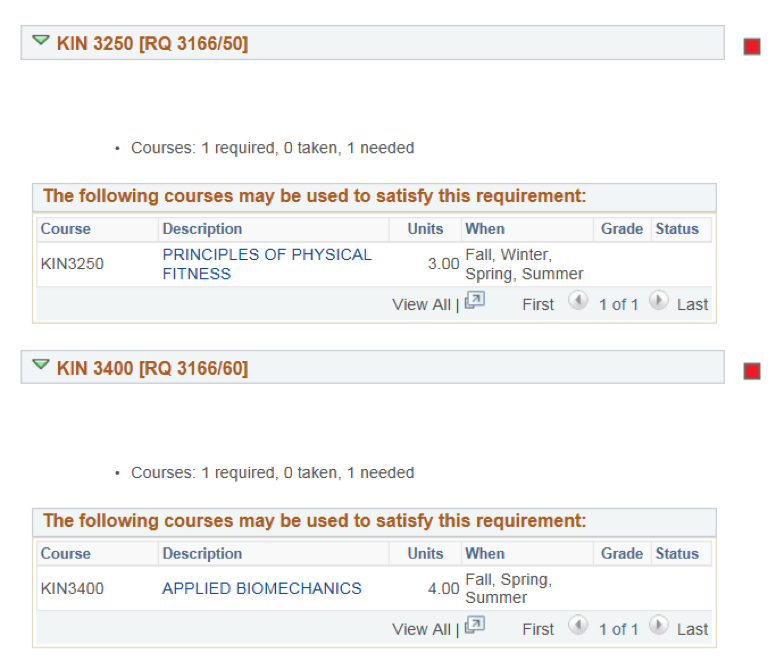
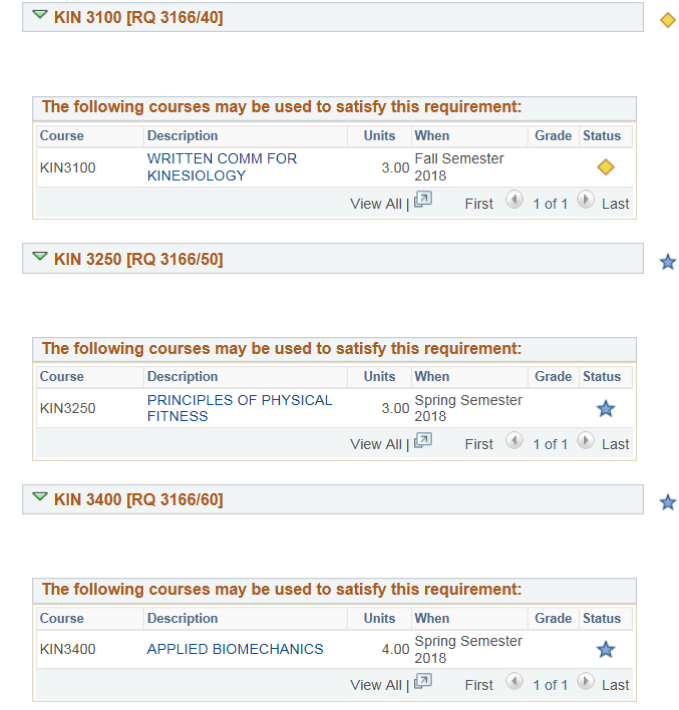
Make note of any missing requirements, as indicated by a red square.
After writing down all of the remaining degree requirements, go back to the Student Center main page and click on the My Planner link.
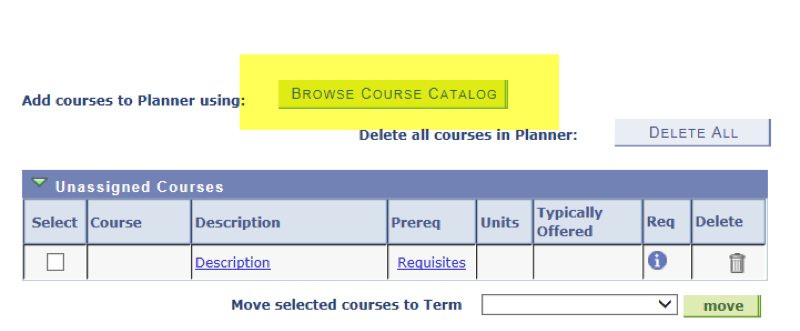
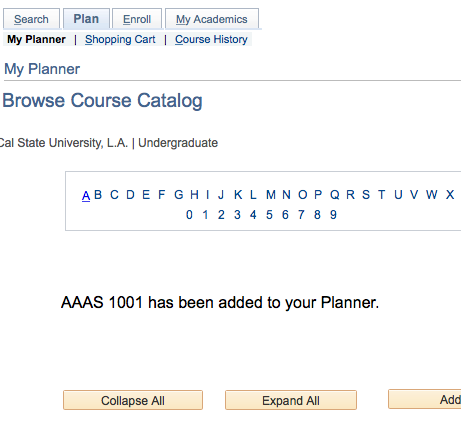
Find the course requirements that you still need to take and add them to your Planner by clicking on the Browse Course Catalog button.
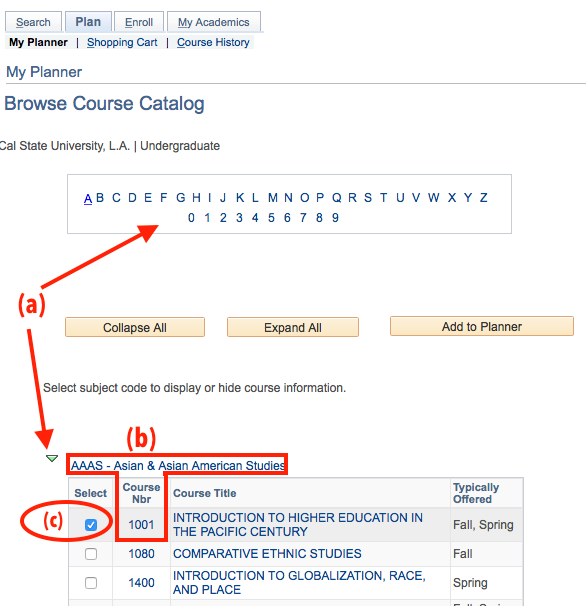
- (a) Use the Alphabetical links and the expand/collapse arrows
- (b) Find the Subject and Course Number (Course Nbr) of the course(s) you wish to add to your degree plan.
(c) Click the Select checkbox next to the course(s) you want to add.
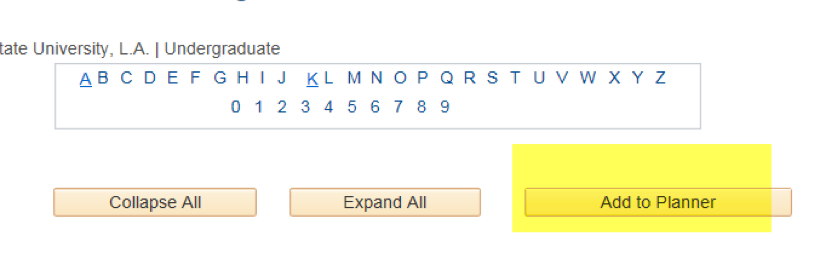
- After you have selected your courses, click on Add to Planner (found at the top of the page):
- You should see a confirmation that the course has been added to your Planner. You can click the My Planner link to return to your planner when you have finished adding courses.
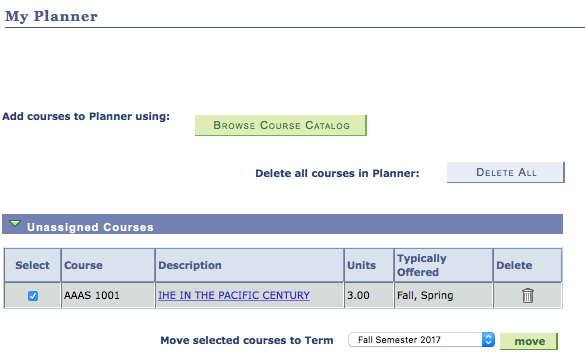
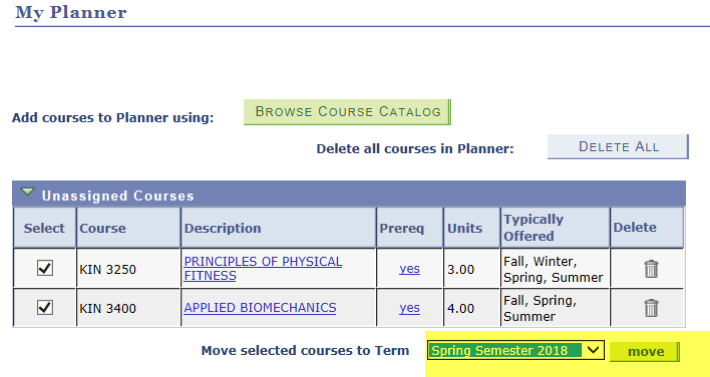
- You will see the course(s) you added listed as Unassigned Courses. This means they have not been assigned to a specific term. To do this, use the checkboxes to pick the courses you want in a specific term, select the term from the pull-down menu, and click the move button.
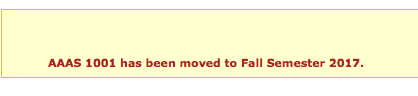
- A message will confirm you have moved the courses.
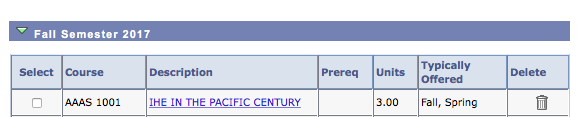
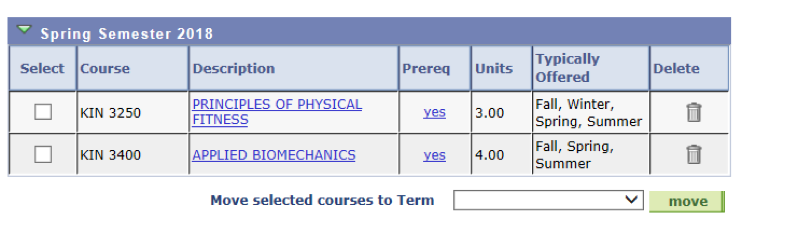
You should now see the course listed under the term you selected.
After adding your remaining courses to your planner, go back to your My Planner page and double-check that you moved the courses to the terms that you will be completing them. All courses need to be assigned to a specific term and should not remain in the Unassigned Courses section.
After assigning all of your courses to terms, view your Advising Report Planned Report again.
Your Advising Report Planned Report should be completed with your remaining In Progress (yellow diamond icon) and Planned (blue star icon) courses. There shouldn’t be any missing requirements as indicated with a red square. The last term listed on your My Planner should match your expected graduation term. If no red squares appear on your My Planner, then you will not need to have an advisor sign your graduation application. Please submit your graduation application with payment to the Cashier’s Office (ADM 128).
If you have a GPA deficiency, as indicated by a red square, consult with your advisor for options on how to increase the GPA.
If after completing your Degree Planner/My Planner, your Advising Report Planned shows green circles, yellow diamonds, blue stars, AND red squares, then you will need to complete the Degree Completion Worksheet. Fill out the worksheet and indicate how the remaining courses that are not satisfied (as indicated by the red square icon) will be satisfied by the end of your expected grad term. Schedule a graduation advising appointment with your advisor and have your advisor sign the Degree Completion Worksheet.
If after submission of your application to the Cashier’s Office, the Graduation Office determines that your My Planner does now show that you are on track to complete the remaining degree requirements by the expected grad term, your graduation application will not be processed. You will become a candidate for graduation once the degree planner is either updated or the degree completion worksheet is updated to indicate how the remaining red squares will be completed by the expected grad term.
Once you have made all your course selections, you can select Advising Report Planned from the drop-down menu in Student Center. Clicking the small circle button next to the drop-down menu will then take you to your Advising Report Blue stars will indicate requirements being satisfied by your planned courses. Look out for the red boxes as those requirements still need attention. Check to see that you have made all the course selections in your plan.
*Click image to see full size version

*Click image to see full size version
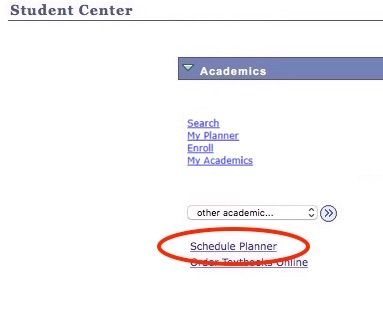
Once the Registrar’s Office has notified you that it is time to plan for the term enrollment, you should start by reviewing and updating My Planner. Once the upcoming semester looks good, simply click on Schedule Planner through the Student Center link.
*Click image to see full size version
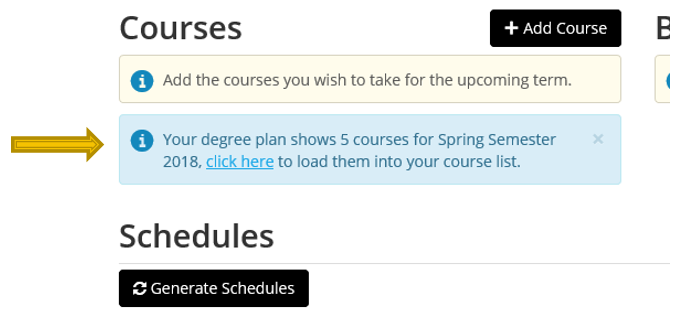
Schedule Planner will then prompt you with one click to load the courses from your plan. Add any personal obligations you are trying to work around and search for all the possible combinations to meet your plan!
*Click image to see full size version
Once you have a preferred course plan for that term, be sure to load it to your shopping cart and use the Validation functionality in advance of your enrollment appointment to make sure you are eligible to enroll in all of the courses. More information about Schedule Planner and Validation can be found in the steps that begin on the Registration and Enrollment page.
Be sure to make an appointment with your advisor if you need assistance with degree planning. More information is available from Advising and the Student Success Center .