
Degree Planner
Graduating in a timely manner is a top priority at Cal State LA. Degree Planner is an online tool allowing undergraduate students to map their entire academic path to graduation. Degree Planner is available for undergraduate majors, minors, and certificates.
Students who can use Degree Planner must:
- Be on the semester curriculum for GE and Major (Fall 16 or later)
- Not have any Cal State LA Quarter Credit
If “Degree Planner” shows in your Student Center, you are eligible – just click it and get started. If you see “My Planner” listed instead please visit the My Planner webpage for more details.
*Click image to see full size version
- The recommendations are based on ideal timely progression.
- The Degree Plan is based on the student’s current progress and updates based on registration, course completions, transfer credit, and substitutions. It automatically adds additional requirements when needed such as calculus preparation or additional needed electives.
- Parameters like unit load are customizable in Degree Planner, and it encourages quick course selection and rearrangement.
- Degree Plan recommendations are based on when courses are typically offered if the schedule of classes is not available for that term.
- The Degree Plan is integrated with degree audit, schedule planner and registration.
- It offers "what-if" capability if you wish to change a major or add a major/minor.
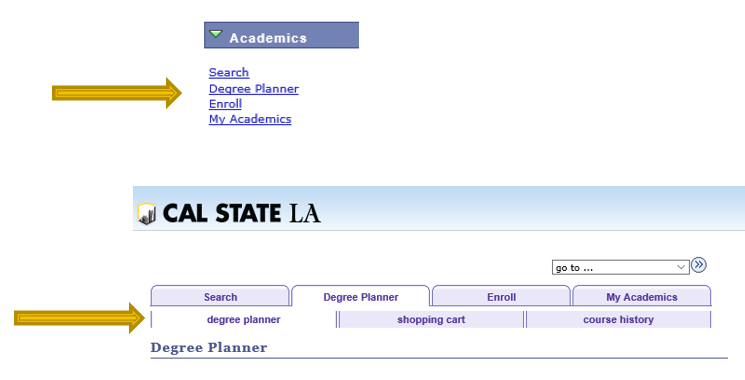
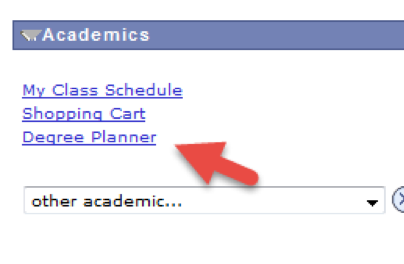
Click on the Degree Planner link.
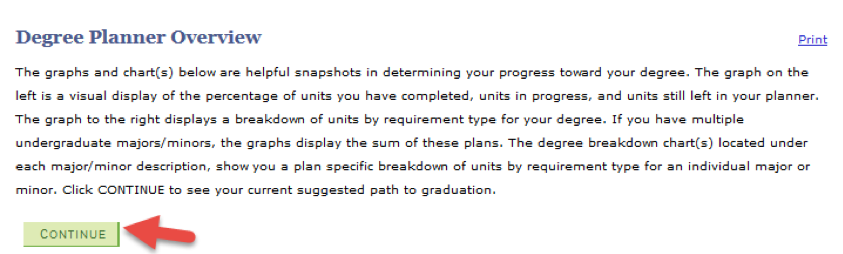
On the Degree Planner Overview page, click Continue
Continue to select remaining courses on the Degree Planner page. Choose a course by clicking on the Select hyperlink. Select your classes until there are no more Not Selected courses appearing on the page.

When you’ve finished selecting your courses, click on the Advising Report Planned link that is found at the top of the page on the right hand side.

Make note of courses that are not completed (red square) and navigate back to the Degree Planner page to add the courses to your Degree Planner by clicking on Add Course.

Once you’ve finished adding any additional courses to the DegreePlanner page, click on Advising Report Planned.
Your Advising Report Planned Report should be completed with your remaining In Progress (yellow diamond icon) and Planned (blue star icon) courses. There shouldn’t be any missing requirements as indicated with a red square. The last term listed on your Degree Planner should match your expected graduation term. If no red squares appear on your Degree Planner, then you will not need to have an advisor sign your graduation application. Please submit your graduation application with payment to the Cashier’s Office (ADM 128).
If you have a GPA deficiency, as indicated by a red square, consult with your advisor for options on how to increase the GPA.
If after completing your Degree Planner, your Advising Report Planned shows green circles, yellow diamonds, blue stars, AND red squares, then you will need to complete the Degree Completion Worksheet. Fill out the worksheet and indicate how the remaining courses that are not satisfied (as indicated by the red square icon) will be satisfied by the end of your expected grad term. Schedule a graduation advising appointment with your advisor and have your advisor sign the Degree Completion Worksheet.
If after submission of your application to the Cashier’s Office, the Graduation Office determines that your Degree Planner does now show that you are on track to complete the remaining degree requirements by the expected grad term, your graduation application will not be processed. You will become a candidate for graduation once the degree planner is either updated or the degree completion worksheet is updated to indicate how the remaining red squares will be completed by the expected grad term.
Once you have made all your course selections, you can select Advising Report Planned from the top of the Degree Planner page to review your Academic Requirement report including all the planned courses. Blue stars will indicate requirements being satisfied by your planned courses. Look out for the red boxes as those requirements still need attention. Check to see that you have made all the course selections in your plan!
 *Click image to see full size version

*Click image to see full size version
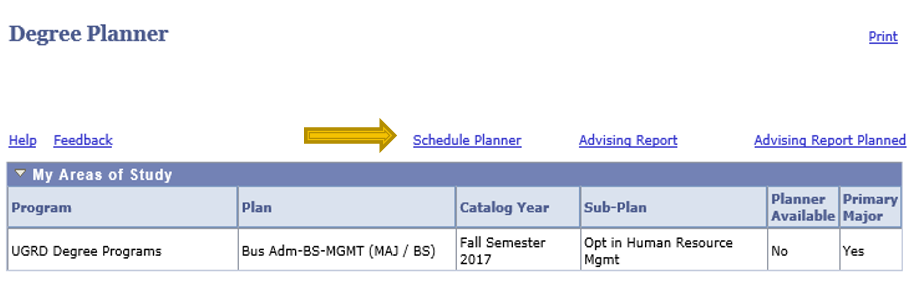
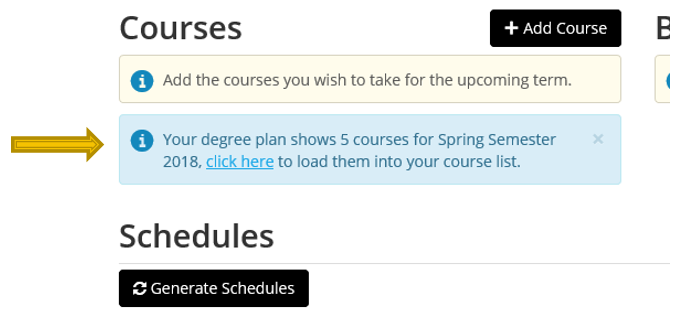
Once the Registrar’s Office has notified you that it is time to plan for the term enrollment, you should start by reviewing and updating your Degree Planner. Once the upcoming semester looks good, simply click on Schedule Planner at the top of the page.
*Click image to see full size version
Schedule Planner will then prompt you with one click to load the courses from your plan. Add any personal obligations you are trying to work around and search for all the possible combinations to meet your plan!
*Click image to see full size version
Once you have a preferred course plan for that term, be sure to load it to your shopping cart and use the Validation functionality in advance of your enrollment appointment to make sure you are eligible to enroll in all of the courses. More information about Schedule Planner and Validation can be found in the steps that begin on the Registration and Enrollment page.
Click the Degree Planner Quick Reference Guide button for a summary of the key features.
Be sure to make an appointment with your advisor if you need assistance with degree planning. More information is available from Advising and the Student Success Center.