Steps for using Cal State LA organizational chart template
Getting Started
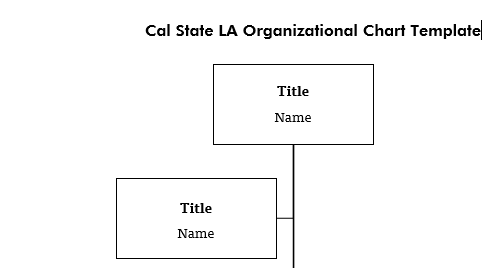
1. The organizational chart template uses Futura in bold for its title and Tisa for each position title (bold) and name. Change the title to the respective office or division the organizational chart applies to. Example: Cal State LA Division of Academic Affairs Organizational Chart, Cal State LA Office of Communications and Public Affairs Organizational Chart, etc...
Creating and removing boxes
2. The organizational chart template begins with 15 position boxes. You can add or take out boxes as you see fit.
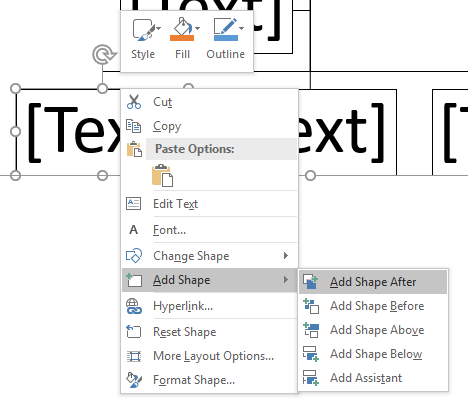
3. To add a box at the same level as another position: Right click the box and hover over Add Shape. A side menu will expand, in which you can select Add Shape Before to add it to the left of the current box or Add Shape After to add it to the right of the current box.
4. To add a box below the current box's position: Right click the box, hover over Add Shape and Select Add Shape Below. When creating a subordinate position, select the box for the respective supervisor when right clicking to add the subordinate position.
5. To add an assistant position stemming from a higher up position: Select the supervisor's box, right click, hover over Add Shape and click Add Assistant. A default example is included in the template with an assistant included for the top official.

6. To remove a position/box: Select box (eight small circles should appear on the edges once it is selected) and press Delete on keyboard.
Typing names and positions
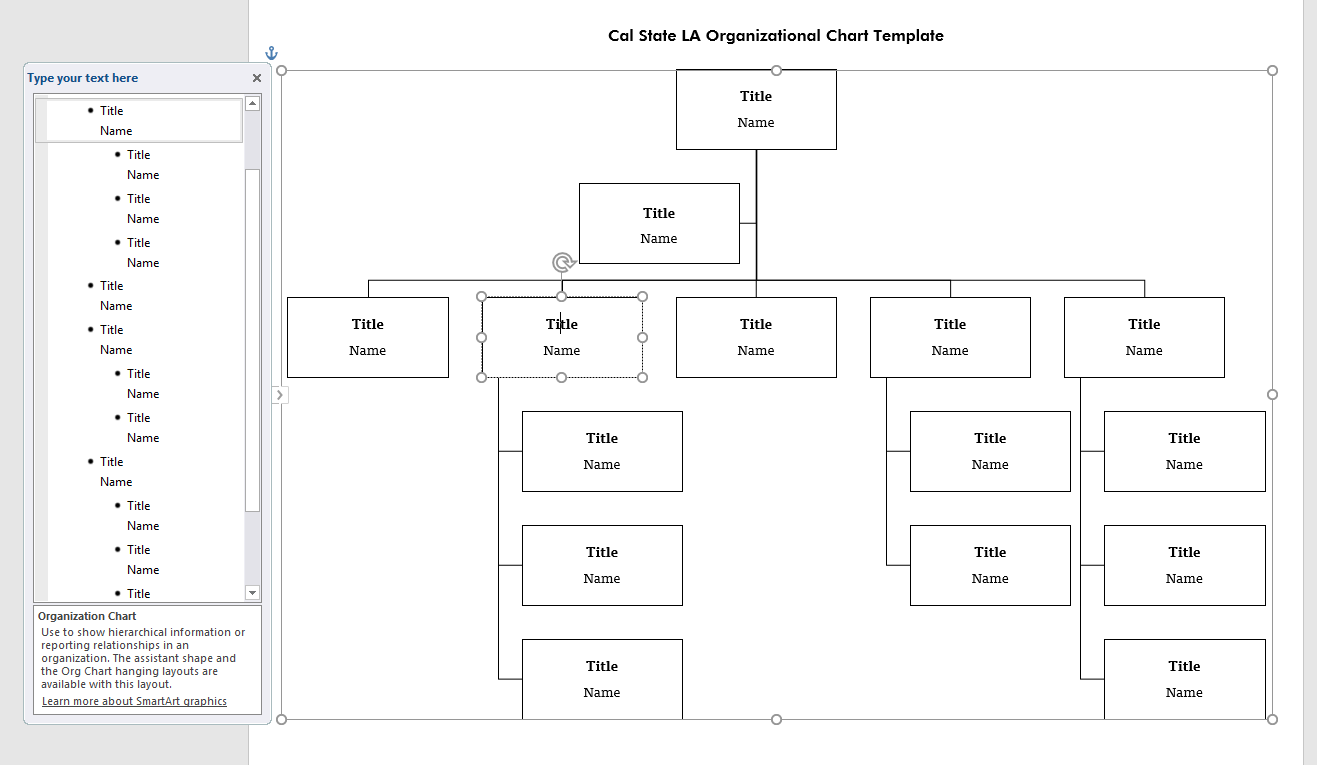
7. To insert names and titles in the organizational chart you can use the pop-out text box or type within the boxes themselves. The template uses the brand font Tisa for titles (bold) and names.
8. As you place your cursor next to each bullet point or click each box, the corresponding box or bullet point will highlight, indicating which positions you are inputting the name for.
Export and save
9. Once you are finished, you can save the file as a PDF to keep formatting and font styles, but be sure to follow instructions on how to create and verify PDF accessibility.